Set up the places, work, and people your business needs, then give each worker one clear way to record time.
Start hereReview setup
Build nextWork Setup + Workers
Finish withAccess + first test
Planning a formal rollout? Use the Timekeeper Implementation Guide before these product setup steps to plan expectations, testing, training, and go-live.
Step 1
Finish your business setup
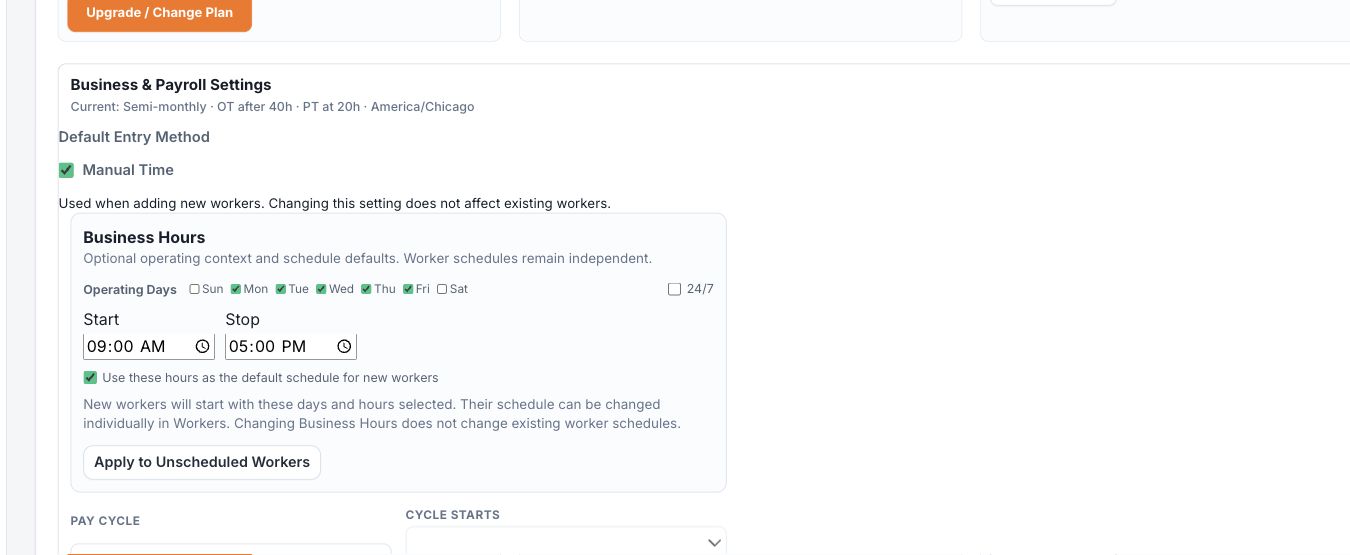
Guided Setup creates a useful starting point. Before adding workers, review the settings that shape new-worker defaults, payroll periods, overtime, and how breaks count.
Open System Settings.
Expand Business & Payroll Settings.
Confirm Default Entry Method. Manual Time unchecked means new workers default to Clock; checked means they default to Manual.
Confirm Business Hours. These can supply a schedule when you add a worker, without changing schedules already saved on worker records.
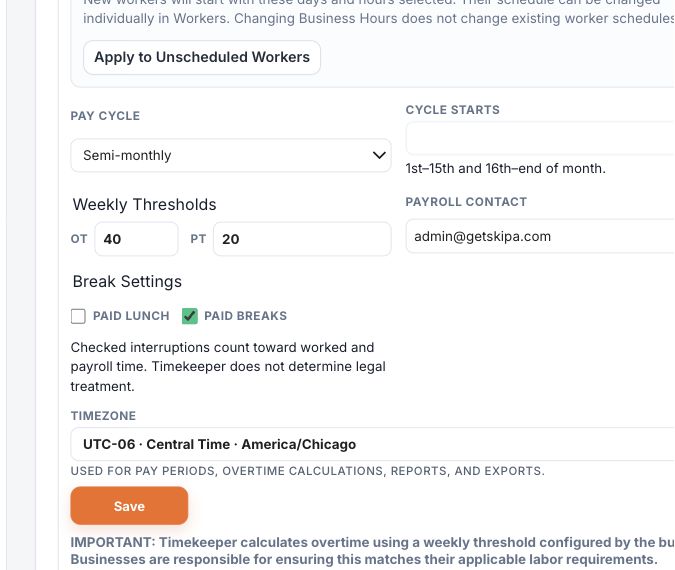
Confirm the pay cycle and cycle start. Timecard Review uses these settings to calculate Current, Previous, and historical payroll periods.
Review weekly OT and PT thresholds, Break Settings, and timezone.
Save only if you make a change.
Weekly thresholdsOT Eligible and PT worker settings determine which threshold applies. These settings classify time; they do not create time.
Break SettingsPaid Lunch and Paid Breaks determine whether those recorded interruptions count toward worked and payroll time.
TimezoneBusiness-local dates, schedules, Work Dates, payroll periods, and reporting all depend on the authoritative business timezone.
Change laterYou can revisit these settings. Check the effective result before changing payroll-cycle anchors after timecards exist.
Default means “for new workers.”Changing the business Default Entry Method does not change existing workers. You choose each worker’s current Entry Method in Workers.
Default Entry Method and Business Hours provide starting values for newly added workers.Payroll period controls, weekly thresholds, and Break Settings belong to the same authoritative business configuration.
Step 2
Add Locations and Jobs / Work Types
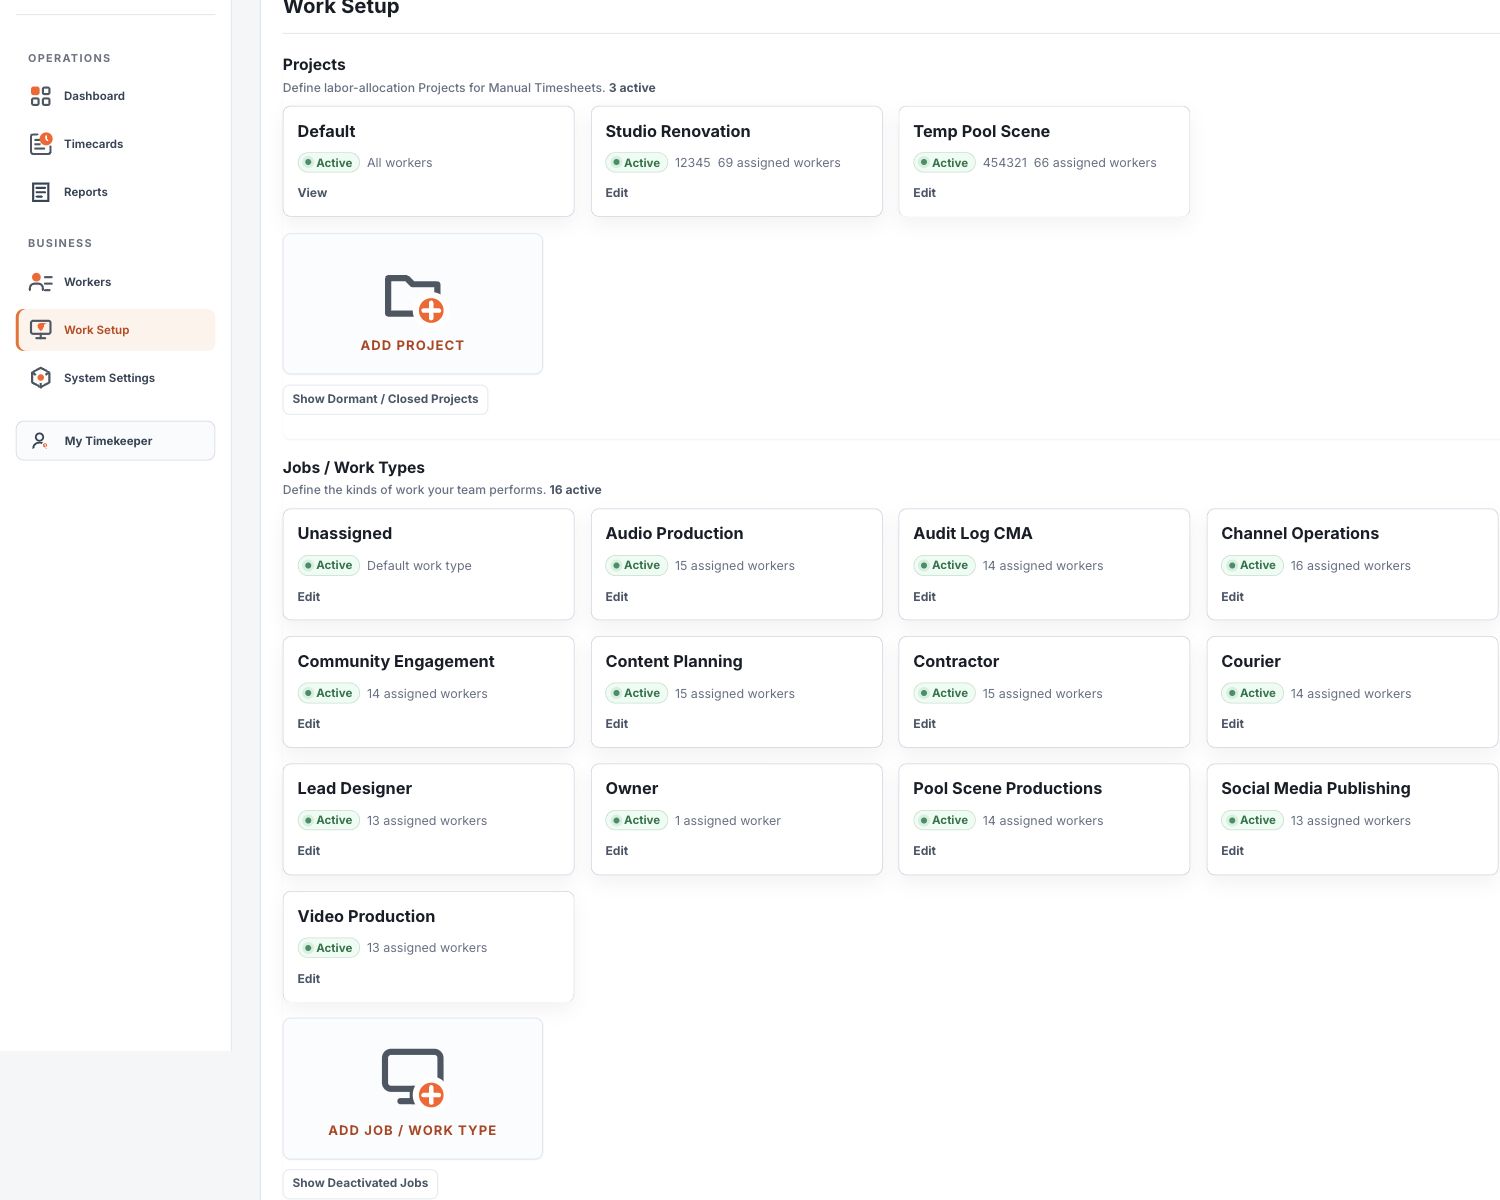
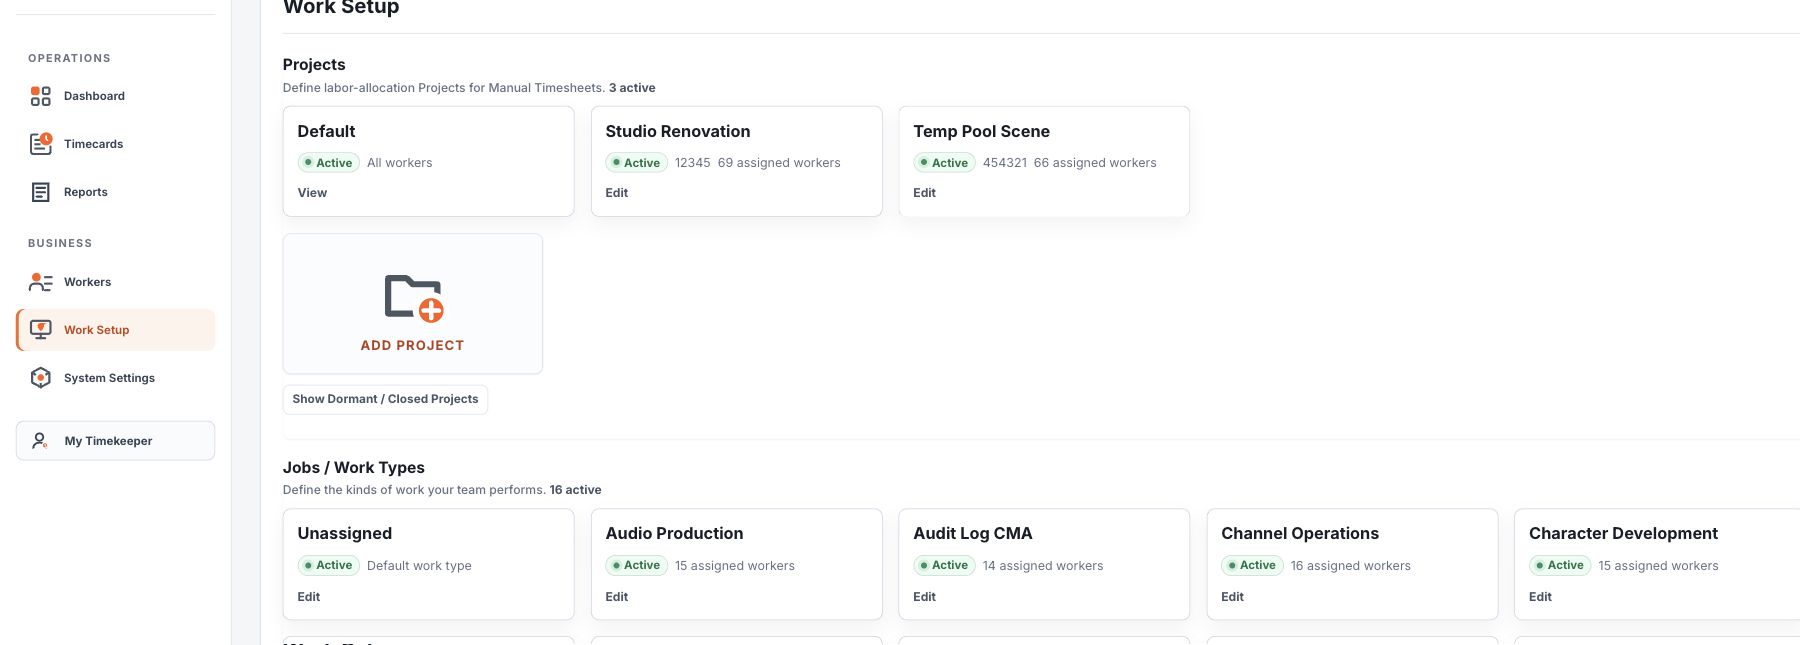
Open Work Setup before adding workers. Creating reusable choices first makes the worker form faster and keeps names consistent.
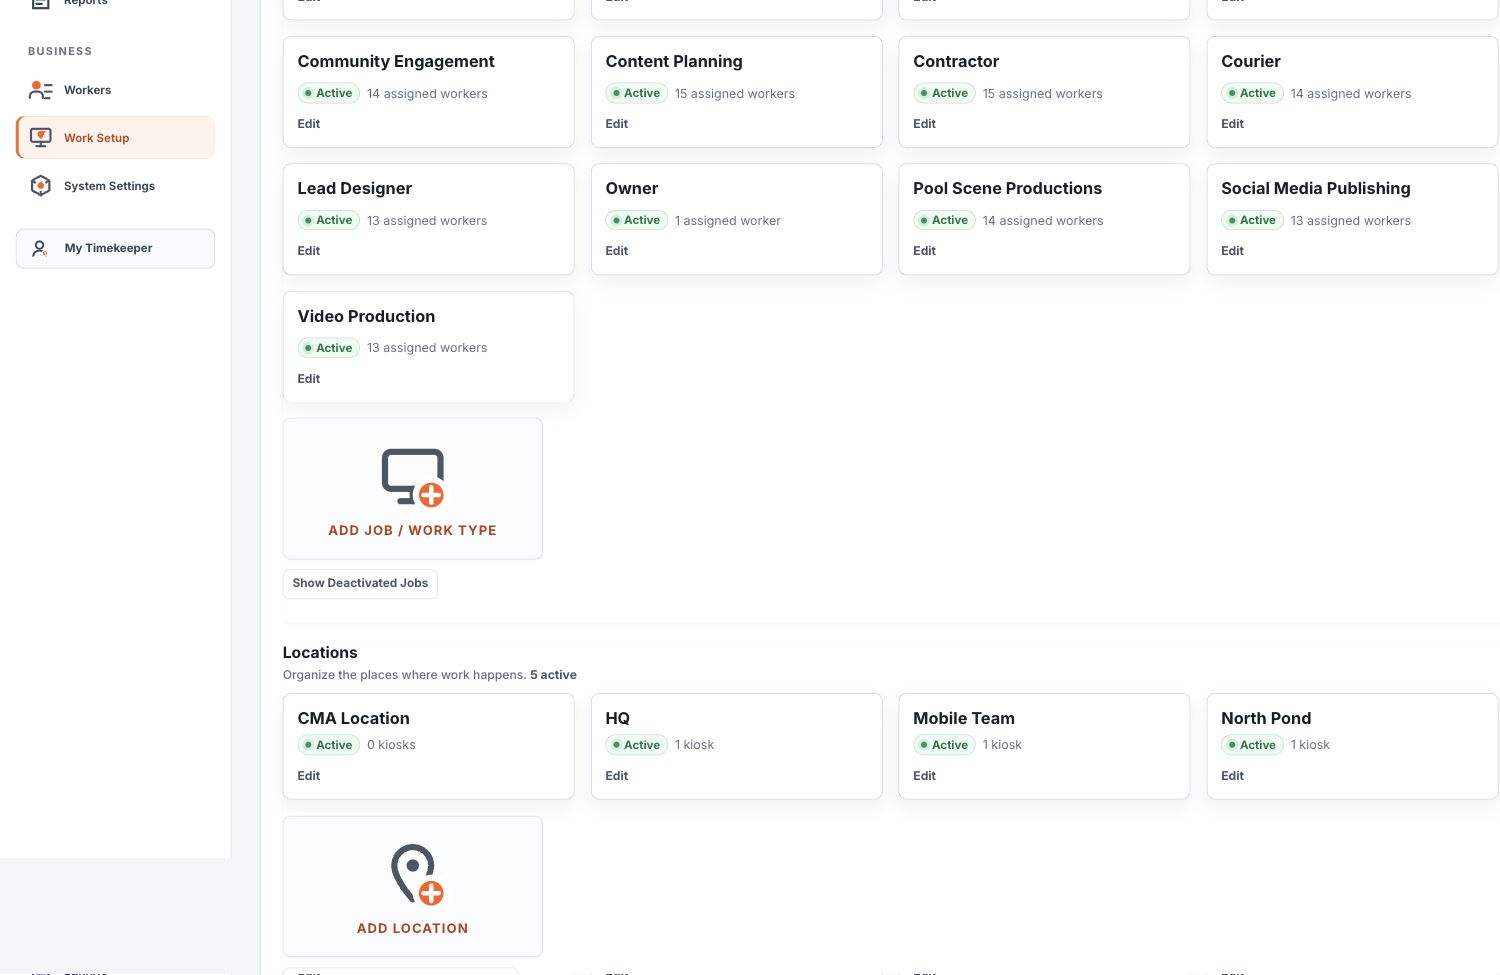
Location / SiteWhere a worker normally works, such as a store, office, job site, or mobile team base.
Job / Work TypeWhat the worker normally does, such as Installer, Server, Driver, or Supervisor.
ProjectThe work, customer, contract, or project to which recorded hours belong.
Shared KioskA common Timekeeper station where eligible workers identify themselves with QR.
Under Locations / Sites, select Add Location, enter a recognizable name, and save.
Under Jobs / Work Types, select Add Job / Work Type, enter the role or work category, and save.
Keep names simple enough that workers and managers recognize them immediately.
After saving, the new choice becomes available in Add Worker, Edit Worker, reporting, and other relevant selectors.
Work Setup keeps Projects, Jobs / Work Types, Locations, and Shared Kiosks in one place.
Create stable work categories before assigning them to workers.Locations provide consistent site names across workers, kiosks, timecards, and reports.
Step 3
Add Projects if you use them
Projects organize recorded hours by the work, customer, contract, or project they belong to. A Project is separate from a worker’s Job / Work Type.
In Work Setup, select Add Project.
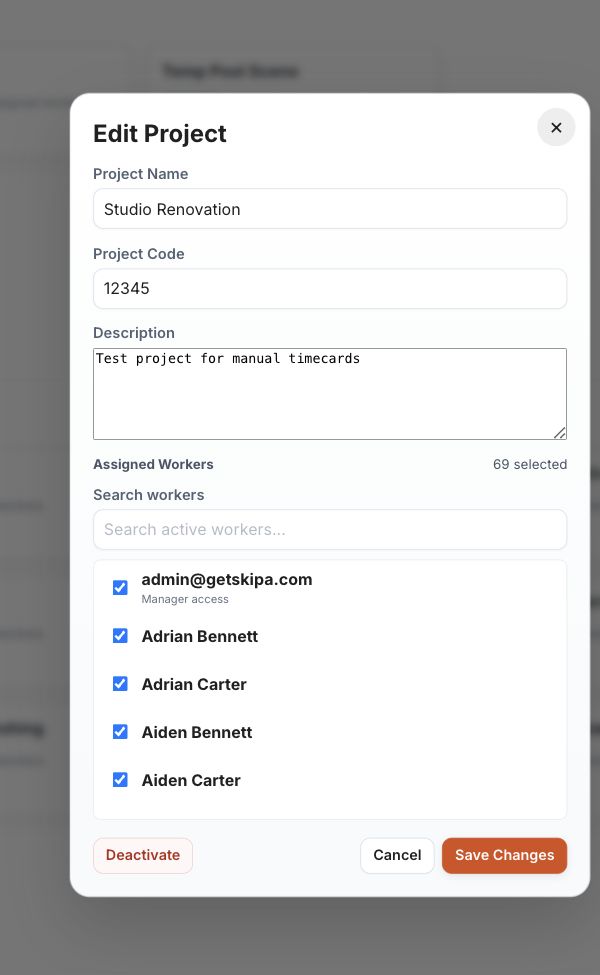
Name the Project. Add a code when your business uses one for billing, contracts, or exports.
Assign the workers who may record time to it. You can also manage memberships later from either Edit Project or Edit Worker.
Use Default as the system fallback Project; customer-created Projects keep their own names.
One Project per Clock entry.When more than one Project is available, a Clock worker chooses at initial Clock In. To change Projects, Clock Out and Clock In again. Manual workers allocate payable hours to Projects on their Manual Timecard.
Projects remain separate from the worker's regular Job / Work Type and Location.Edit Project manages the current eligible-worker set without rewriting historical time attribution.
Step 4
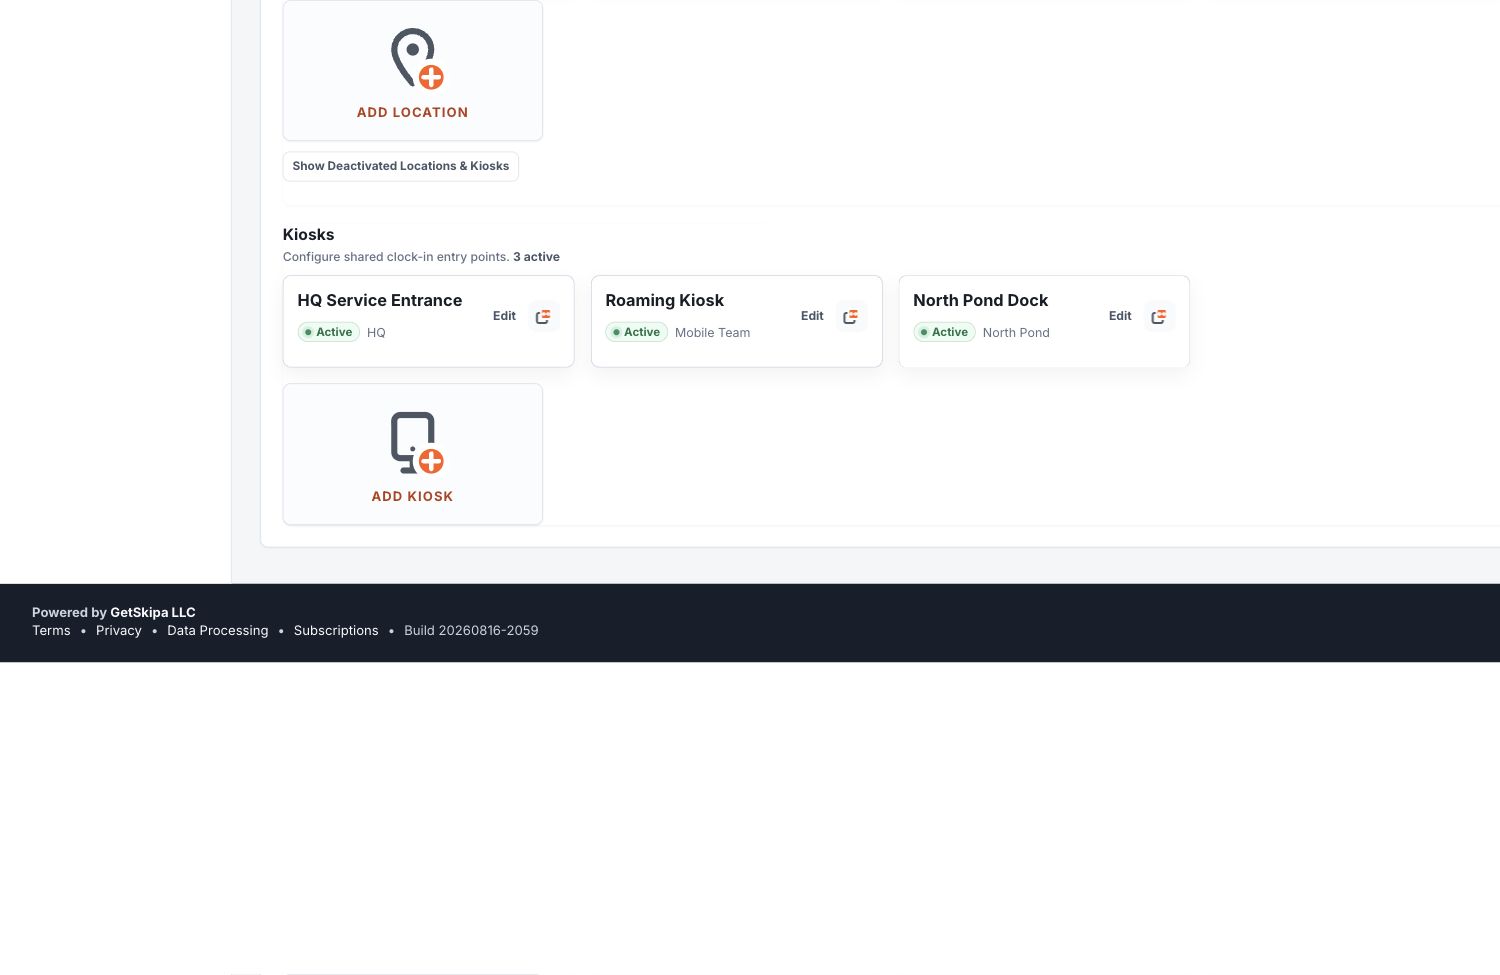
Set up a Shared Kiosk if needed
A Shared Kiosk is a common Timekeeper station where workers identify themselves with their QR badge or image. Kiosk clocking is included with Timekeeper.
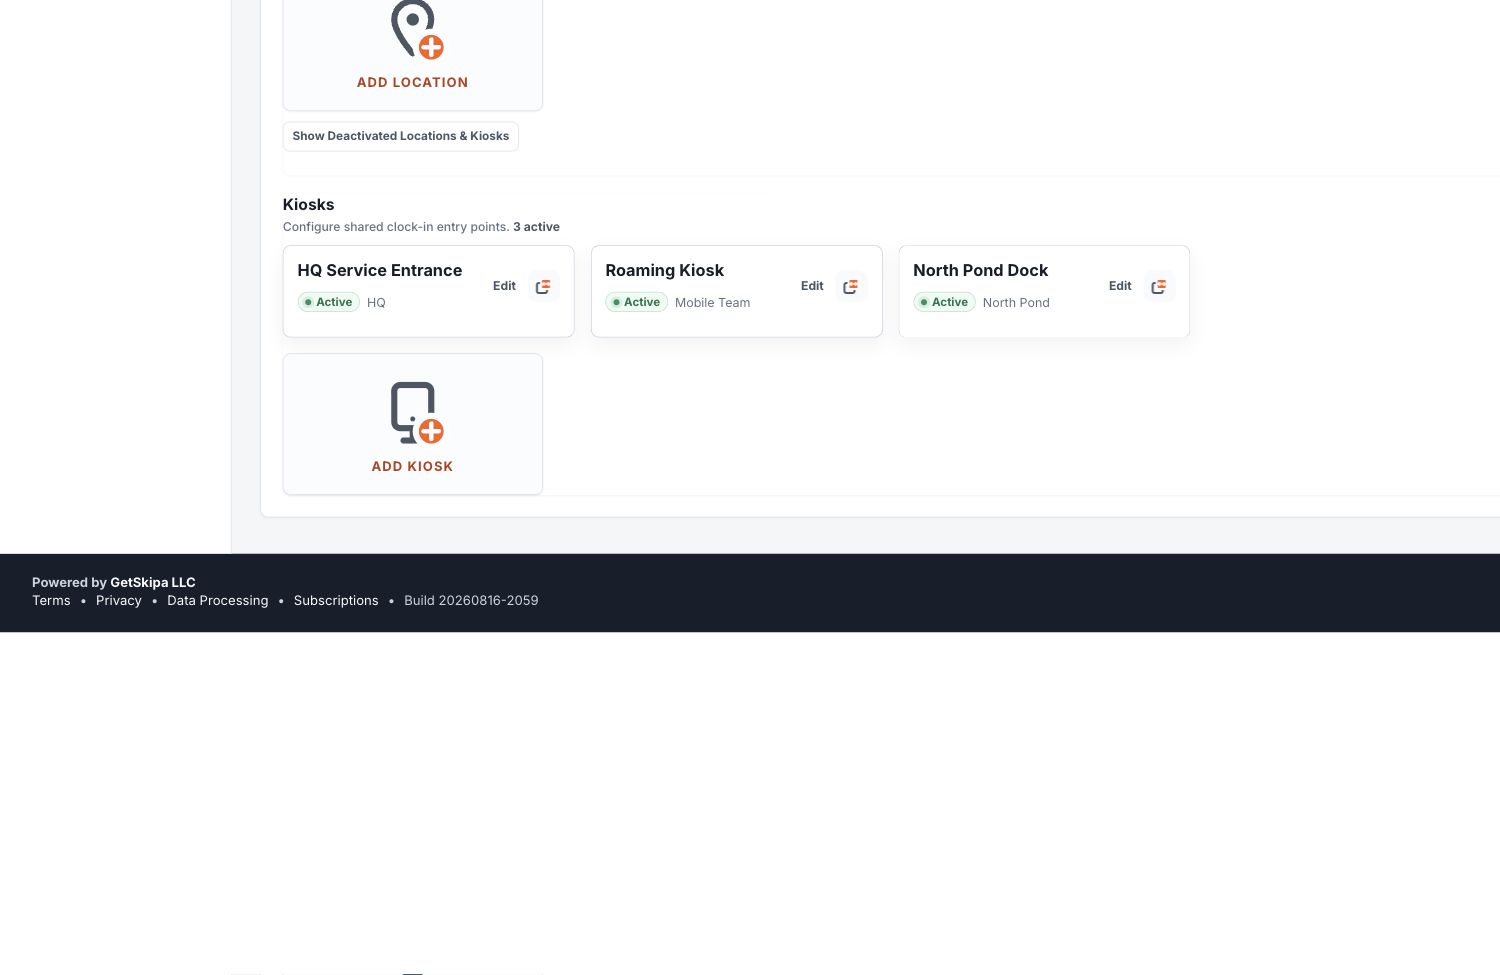
In Work Setup → Kiosks, select Add Kiosk, name it, and assign its Location.
Choose the existing kiosk options your operation needs, including whether Lunch / Break actions are available.
Save, then copy the kiosk link to the station that will remain at that work area.
Test camera access and scanning before workers arrive.
Kiosk Only controls initial entry.A Kiosk Only worker starts a Clock or presence session through kiosk authentication. Once a session is active, the worker’s Work Link can still show valid active-session actions. Clock kiosk actions create payable Clock time; Manual kiosk actions record presence only.
Create and maintain Shared Kiosks in Work Setup. A worker sees QR access only when kiosk use is relevant.
Step 5
Add your workers
Open Workers and select Add New. The same field structure is used later when you edit a worker, so current configuration stays easy to find.
Enter the worker’s identity and Payroll ID / Unique ID.
Choose Job / Work Type, Location / Site, Assigned Manager, and eligible Projects.
Set Entry Method, operational flags, schedule, and PIN as appropriate.
Select Create Worker.
Display NameThe name Timekeeper shows throughout day-to-day screens. First and Last Name remain separate identity fields.
Payroll ID / Unique IDYour own payroll or workforce identifier. Leave it blank if your business does not use one; Timekeeper does not substitute an internal UUID.
Job / Work TypeThe worker’s normal role or type of work. It is not the same thing as a Project.
Location / SiteThe worker’s normal site or operational location.
Assigned ManagerConnects the worker to assigned-manager views and workflows while existing role and tenant authorization remain authoritative.
ProjectsA multi-select list of the Projects this worker may use. Removing a current assignment does not rewrite historical time.
Entry MethodClock creates payable Clock entries. Manual makes the Manual Timecard the payable-time authority.
Kiosk OnlyRequires kiosk authentication to begin an inactive Clock or presence session. It does not hide valid actions after a session is active.
OT Eligible and PTChoose the threshold rules that apply to the worker. These flags do not create or edit time.
Manager AccessGrants the worker the existing Manager dashboard role and its authorized workflows.
Work ScheduleSelect expected days plus Start and Stop. Use the business schedule default when it fits, then tailor the worker as needed.
PIN and Worker QRSet a PIN when your workflow requires it. Worker QR and Kiosk Only controls become available when the business has at least one Shared Kiosk.
Worker RosterThis is where Owners and authorized Managers maintain current worker setup, distribute Work Links, and download QR material.
Step 6
Choose how each worker records time
Clock
The worker uses Clock In and Clock Out. Completed Clock entries are the authority for payable time.
Manual
The worker enters payable hours on a Manual Timecard. Check In and Check Out record presence only and do not create payable Clock time.
Choice
What it means
What workers do
Clock
Completed Clock entries are payable facts.
Clock In, use allowed Lunch / Break / Return actions, then Clock Out.
Manual
Saved Manual Timecard allocations are payable facts.
Enter hours by Work Date and Project. Optional Check In / Check Out records presence only.
Mixed business
Different workers may use different Entry Methods.
Each worker follows the method stored on that worker; historical Clock and Manual facts keep their source.
Confirm every worker’s Entry Method, schedule, Manager, Location, Job / Work Type, and Project assignments before distributing access. You can change a worker later using the established transition rules; do not recreate the worker to change methods.
Manual presence is not Manual payable time.Manual workers manually enter their hours on a timecard. Their Timekeeper URL and a Shared Kiosk, if used, can still record Check In and Check Out for presence.
Step 7
Give workers access
From the Worker Roster, copy each worker’s personal Work Link or download their QR material. Share credentials privately, then have the worker test access before the first shift.
Work Link: the worker’s personal route to My Timekeeper while its credential remains current.
QR: identifies that worker at an eligible Shared Kiosk.
Kiosk Only: the QR remains available, but an inactive worker must begin through kiosk authentication. Valid active-session controls may still appear on the Work Link.
On Worker Home, an eligible QR appears as a quiet tile. Tapping or clicking it opens the larger QR view, where the worker can download it without creating a Clock, presence, payroll, or audit event.
Refresh QR & Work Link rotates one shared credential.The old QR and old Work Link stop working. Share the replacement Work Link and QR with the worker after a confirmed refresh.
Step 8
Run your first workday
Clock worker
Open the Work Link or scan at the kiosk. Kiosk Only workers must use the kiosk for initial Clock In.
Choose a Project at initial Clock In when more than one eligible Project is available.
Use Lunch, Break, Return, and Clock Out only as the current state allows.
To change Projects, Clock Out and begin a new Clock entry under the next Project.
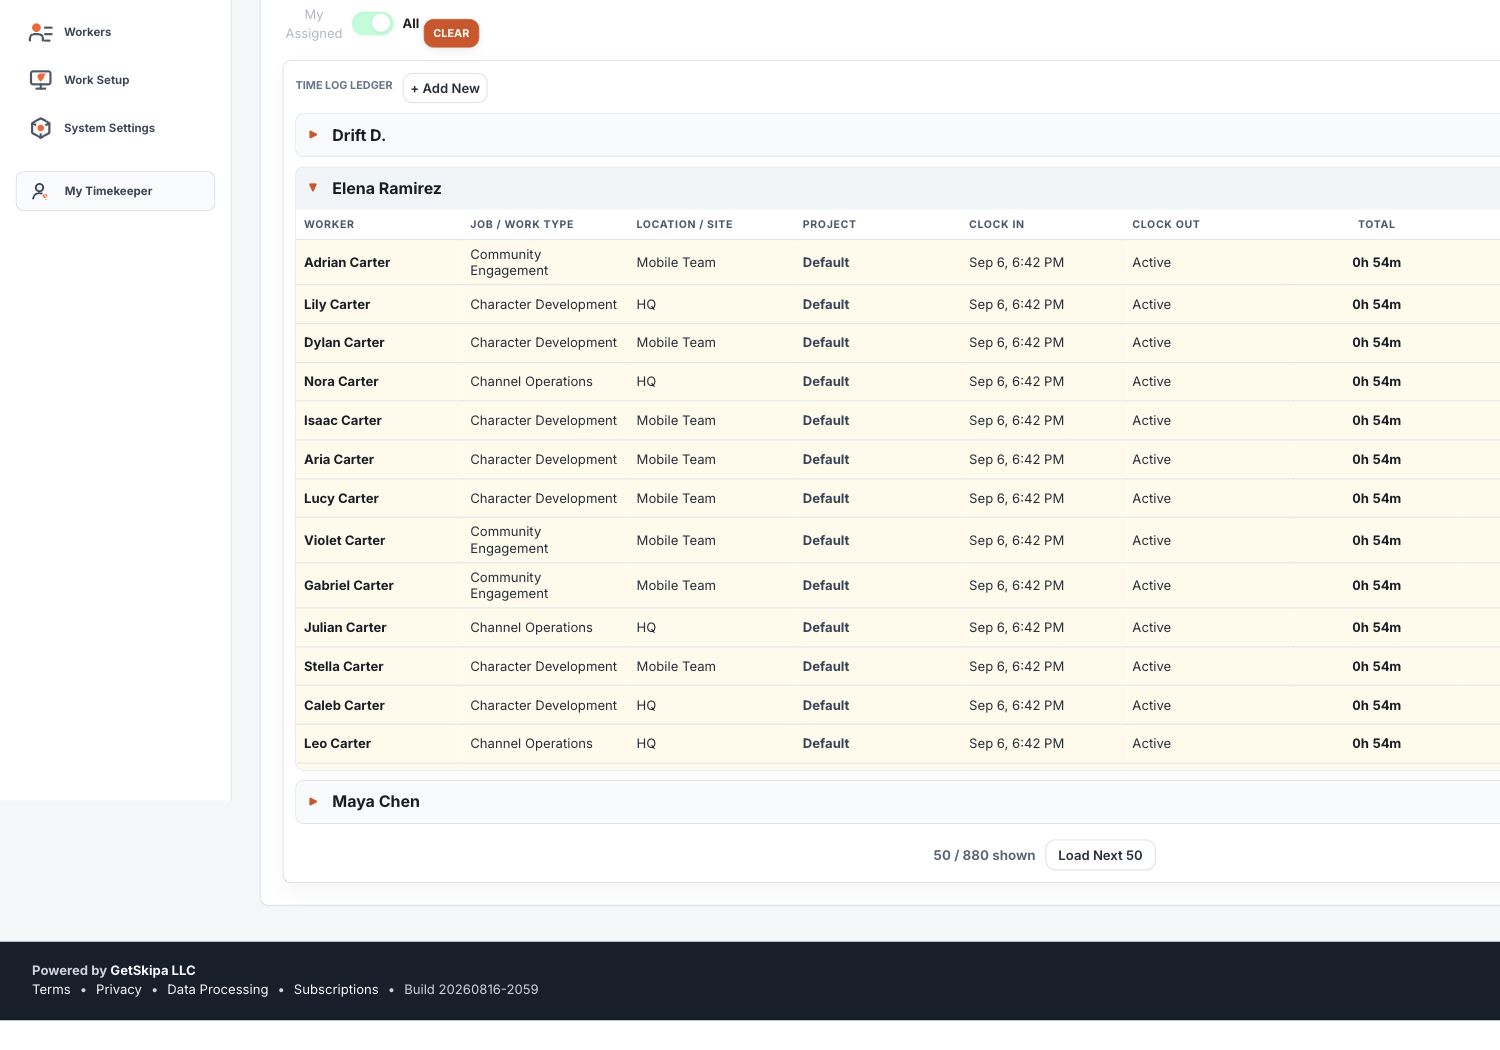
Confirm the completed entry appears in Timecards and Time Log Review.
Manual worker
Open My Timekeeper and the Manual Timecard for the relevant payroll period.
Enter payable hours for the correct Work Date and allocate them to Projects as needed.
Save and confirm the daily and period totals.
Use Check In / Check Out only when your business wants presence status.
Confirm the saved allocations appear in Timecards and Time Log Review.
Test one complete workflow for each Entry Method you use.
Confirm the correct worker, Project, Location, and current state.
Correct mistakes through the authorized Timecard or Time Log workflow instead of deleting and recreating workers.
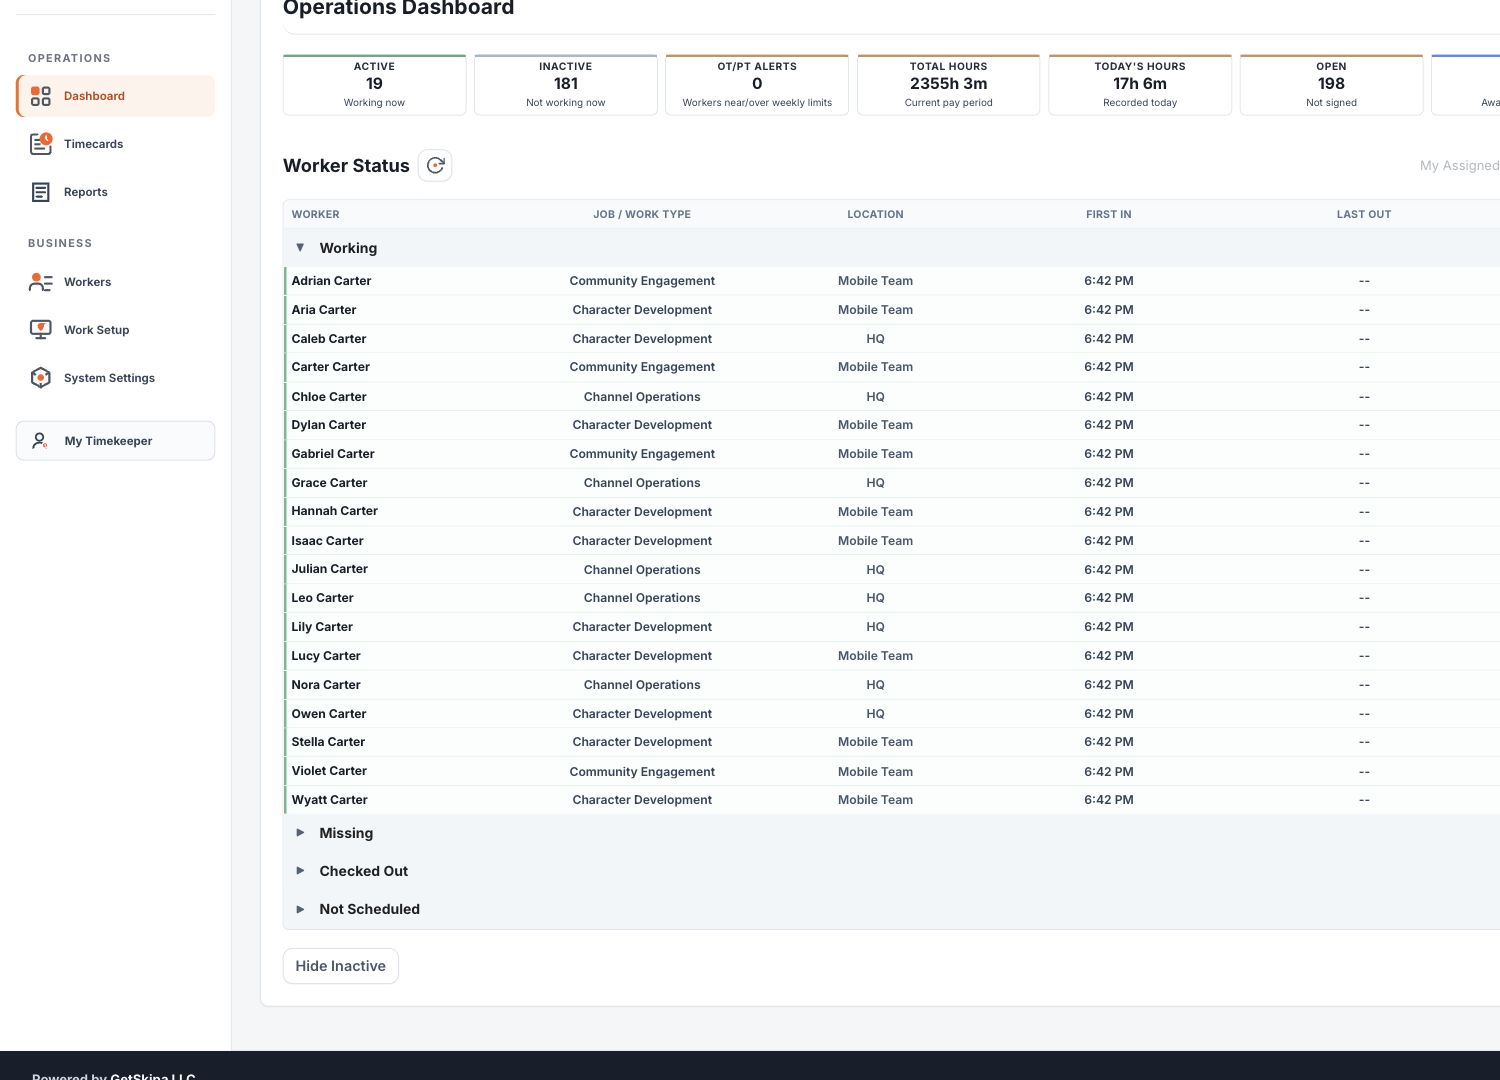
The Operations Dashboard gives Owners and Managers a current view without replacing Timecard review.
Step 9
Review Timecards
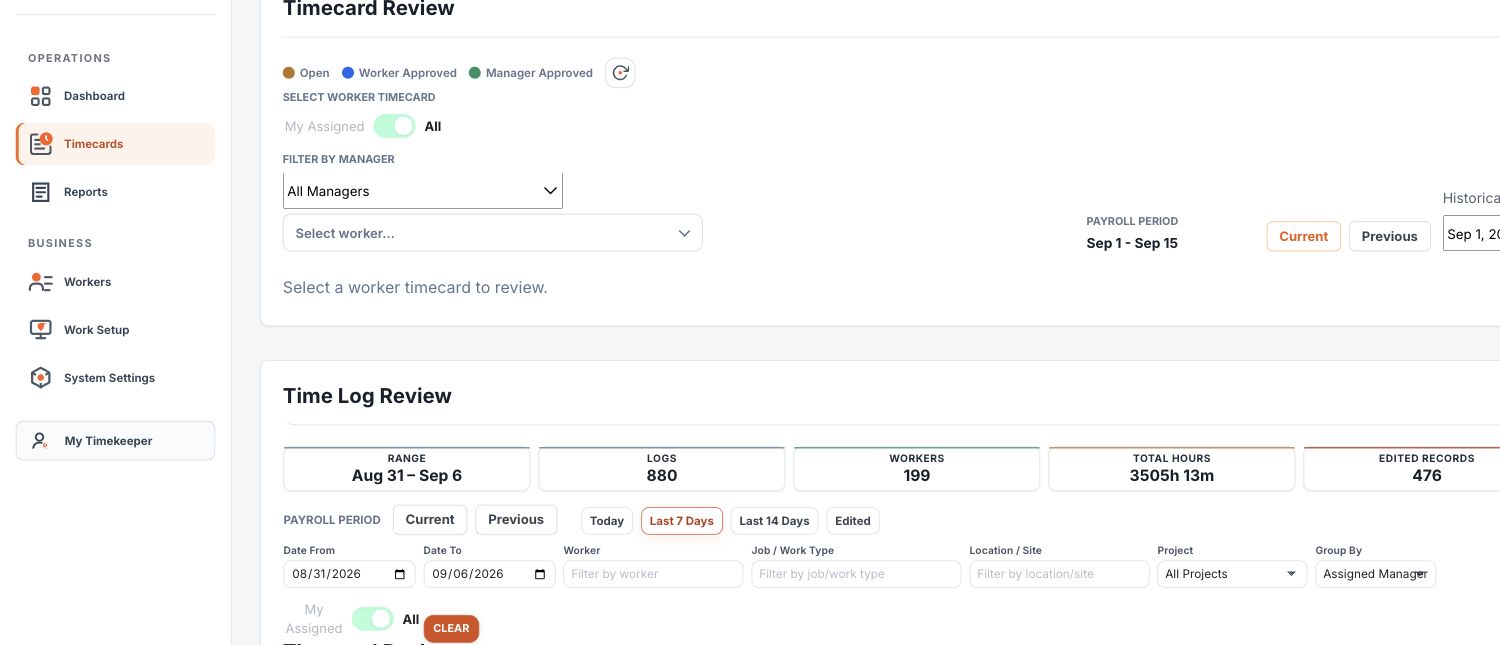
Open Timecards.
Select Current, Previous, or a historical payroll period.
Filter by Manager if useful, then select a worker timecard.
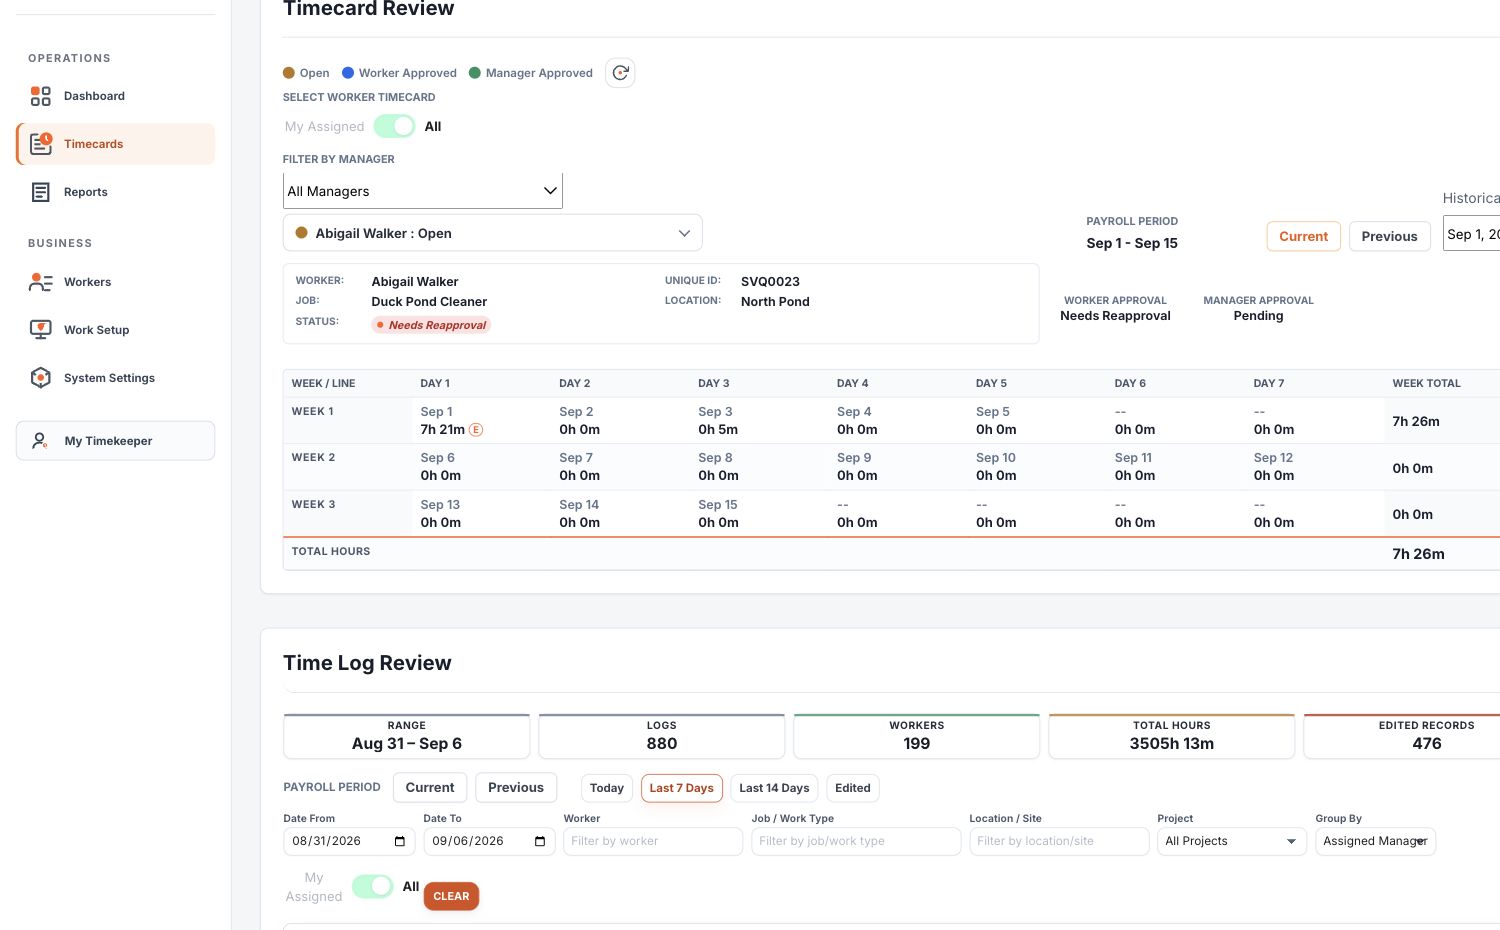
Review Clock and Manual records, totals, Worker Approval, and Manager Approval.
Use Approve when the timecard has been reviewed and is correct.
Timecard ReviewA payroll-period summary for one worker. Use it to review totals and authoritative Worker and Manager approval status.
Time Log ReviewThe detailed ledger of Clock and Manual facts. Use authorized actions here when a historical entry needs correction.
Worker Approval can be Pending, Needs Reapproval, or Approved with its stored timestamp. Manager Approval is Pending or Approved with its stored timestamp. If a time edit invalidates an earlier worker approval, Needs Reapproval tells you the worker must approve the revised timecard again.
Current and Previous are quick period shortcuts. Use the historical period selector for older periods. The Manager filter narrows the worker list after the current authorized scope is applied; it does not broaden access.
Timecard Review begins with a worker selection so you control whose payroll period you review.After selection, review the worker summary, period grid, totals, and approval status before approving.Time Log Review is the detailed companion to the payroll-period Timecard.
Step 10
Use Reports and Audit
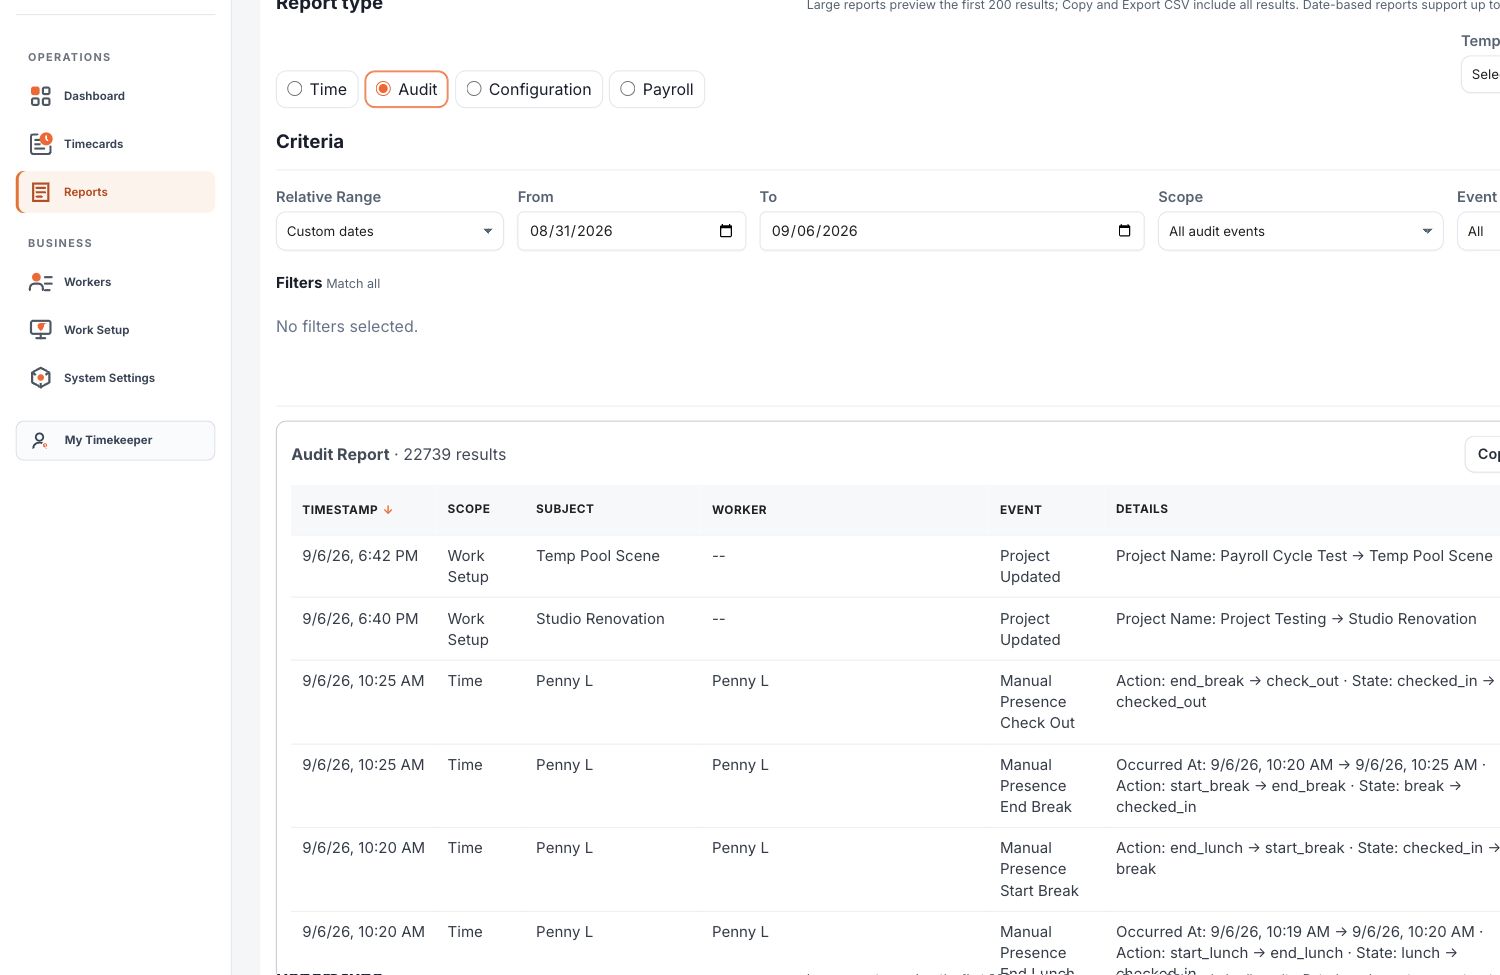
Open Reports, choose a family, set its variation and criteria, then select Run Report. Criteria changes do not silently rerun the last report.
Time: analyze authoritative Clock and Manual facts by worker, Work Date, Project, and other selected fields.
Audit: review changes and activity by scope, event family, actor, and date.
Configuration: review current Workers, Managers, Business Settings, Projects, and Kiosks configuration.
Payroll: review payroll-period summaries, detail, and transfer-ready output when payroll settings are configured.
Choose the report family and variation.
Select a fixed date range or an available relative range such as Last 7 Days, Last 30 Days, or Last Quarter.
Add filters and choose whether they match all or any, where offered.
Review columns, then select Run Report.
Use Load Next when browsing a large on-screen result. Copy and Export CSV retrieve the complete matching data without requiring you to load every preview page first.
Paid plans can save report configurations as reusable templates. Relative templates store the relative rule so the dates resolve when the report is run; fixed-date templates keep their fixed dates.
Audit is historical evidence.Use Audit filters to narrow the event family, scope, actor, worker, Project, Job, Location, or Kiosk. Export preserves the active criteria while collecting large results in bounded pages.
Reports keeps selection and criteria together; changing criteria alone does not run the report.
Where to go next
You are ready to operate.
For daily work
Use Dashboard for current status, Timecards for review, and Workers or Work Setup when assignments change.
For deeper help
Use the Book of Timekeeper for fuller explanations of workflows, policy boundaries, and troubleshooting.
Keep worker assignments current when roles, sites, managers, or Projects change.
Review Timecards before payroll and resolve Needs Reapproval.
Use Audit and reports to answer questions without changing historical facts.
Built for clarity, not complexity.Start with the setup your business needs today. You can refine worker assignments, Projects, schedules, and reporting later without changing historical time.