Quick Setup Guide
GetSkipa Timekeeper Setup and Troubleshooting
A short setup guide for creating a Timekeeper business in the order most owners should follow.
Chapter 1
Create Your Timekeeper
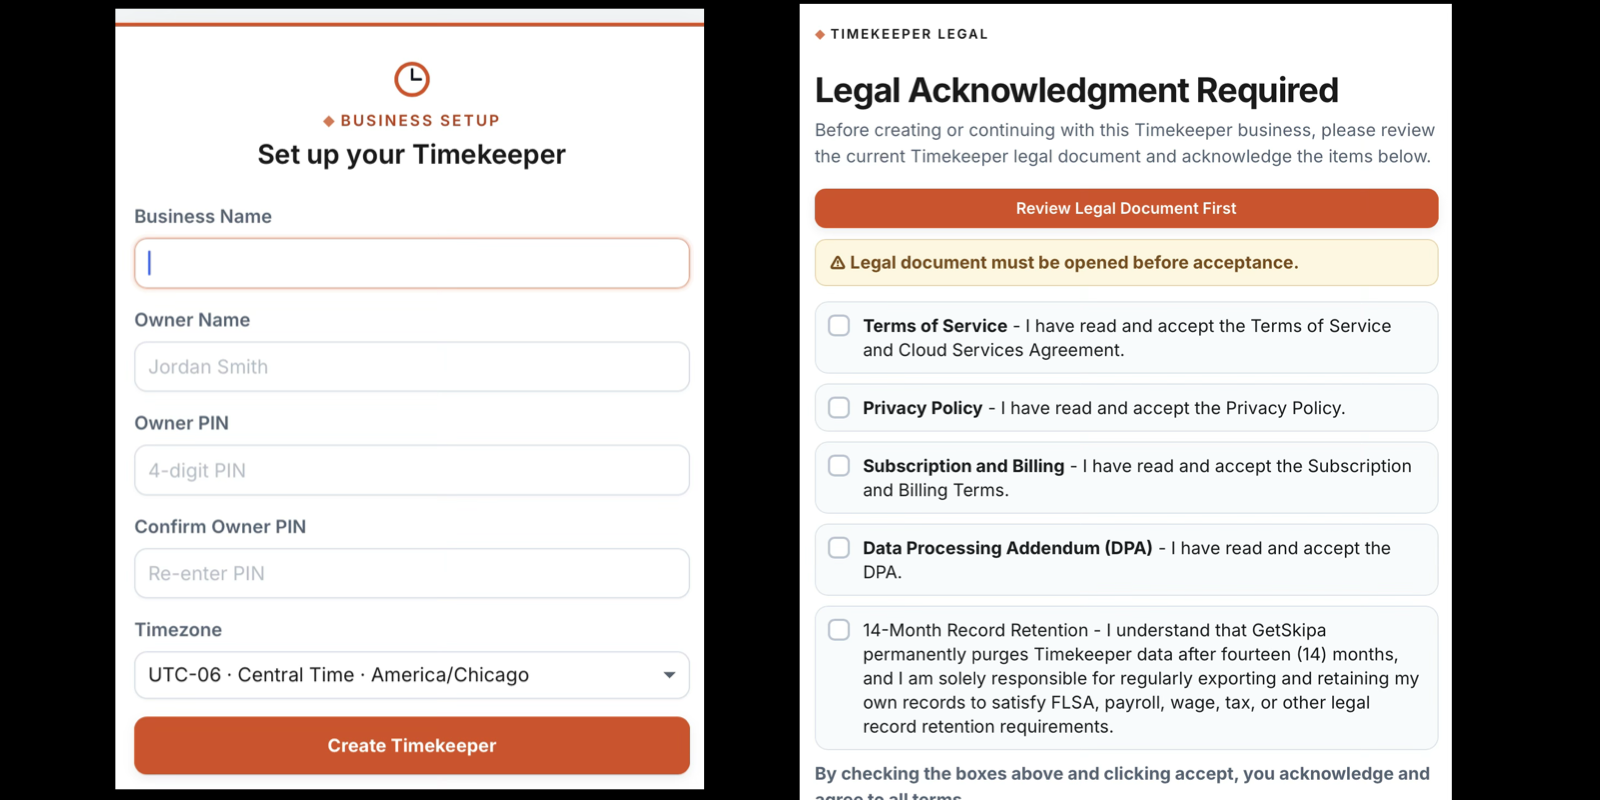
Start by creating your Timekeeper business. This creates the workspace that stores your business settings, jobs, locations, kiosks, workers, reports, and payroll records. Choose an Owner PIN you'll remember. It's required to manage your business.
Before continuing, review and accept the required legal acknowledgements. Timekeeper will not create the business until each required item has been accepted.
Chapter 2
Business Settings
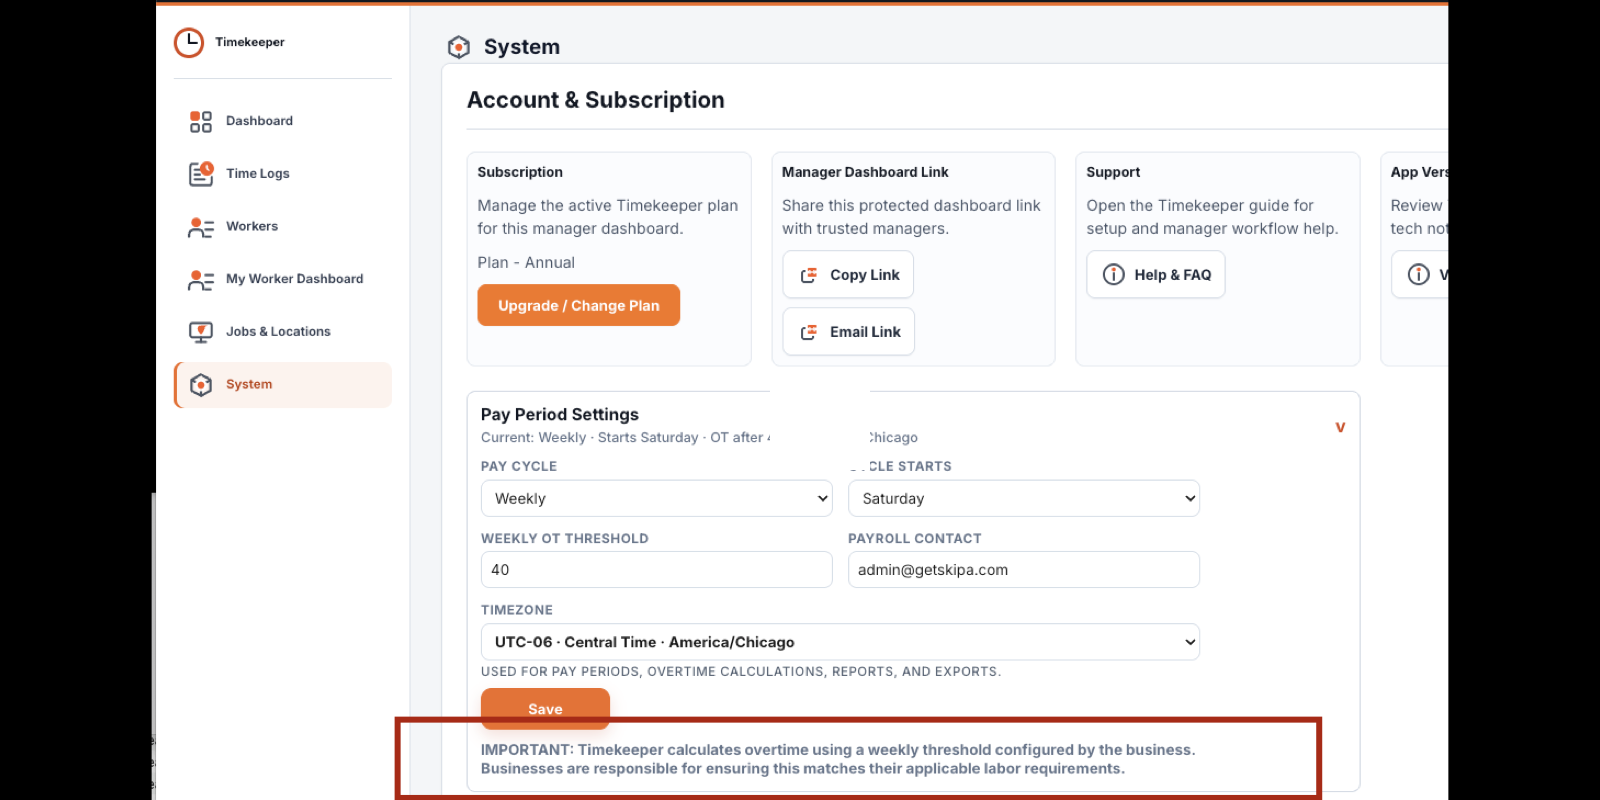
After the business exists, review the business settings before adding the rest of the setup data. These settings control how Timekeeper groups, displays, and reports time.
Chapter 3
Jobs / Work Types
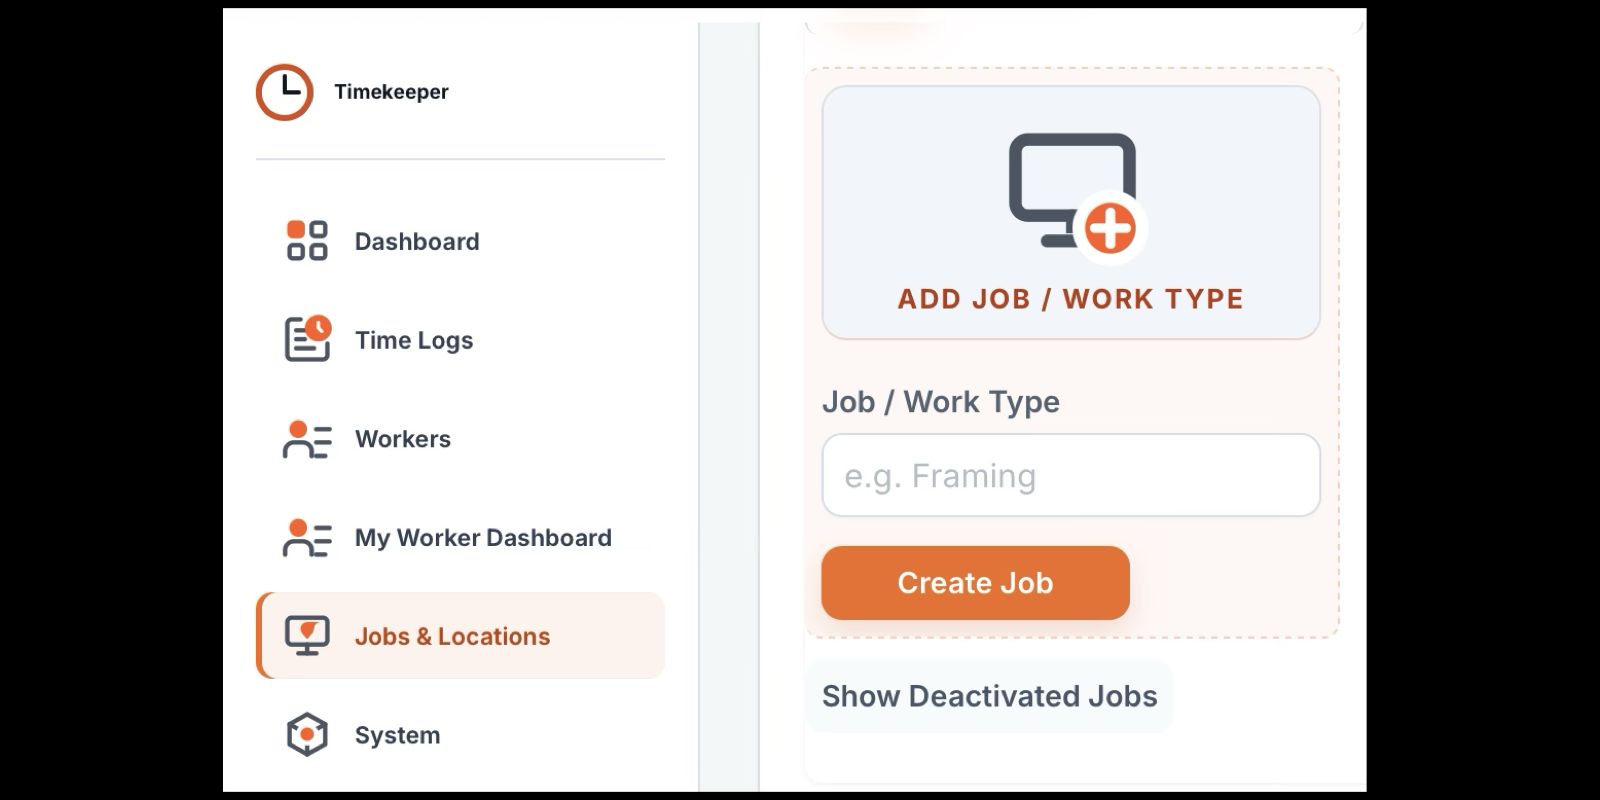
Create jobs or work types before adding workers. Jobs describe the kind of work being performed and become available when assigning workers, assigning kiosks, filtering logs, and reviewing reports.
Use names your business will still understand later. Examples include Cleaner, Crew Lead, Maintenance, Office, Event Staff, Manager, or Shop Work.
Chapter 4
Locations / Sites
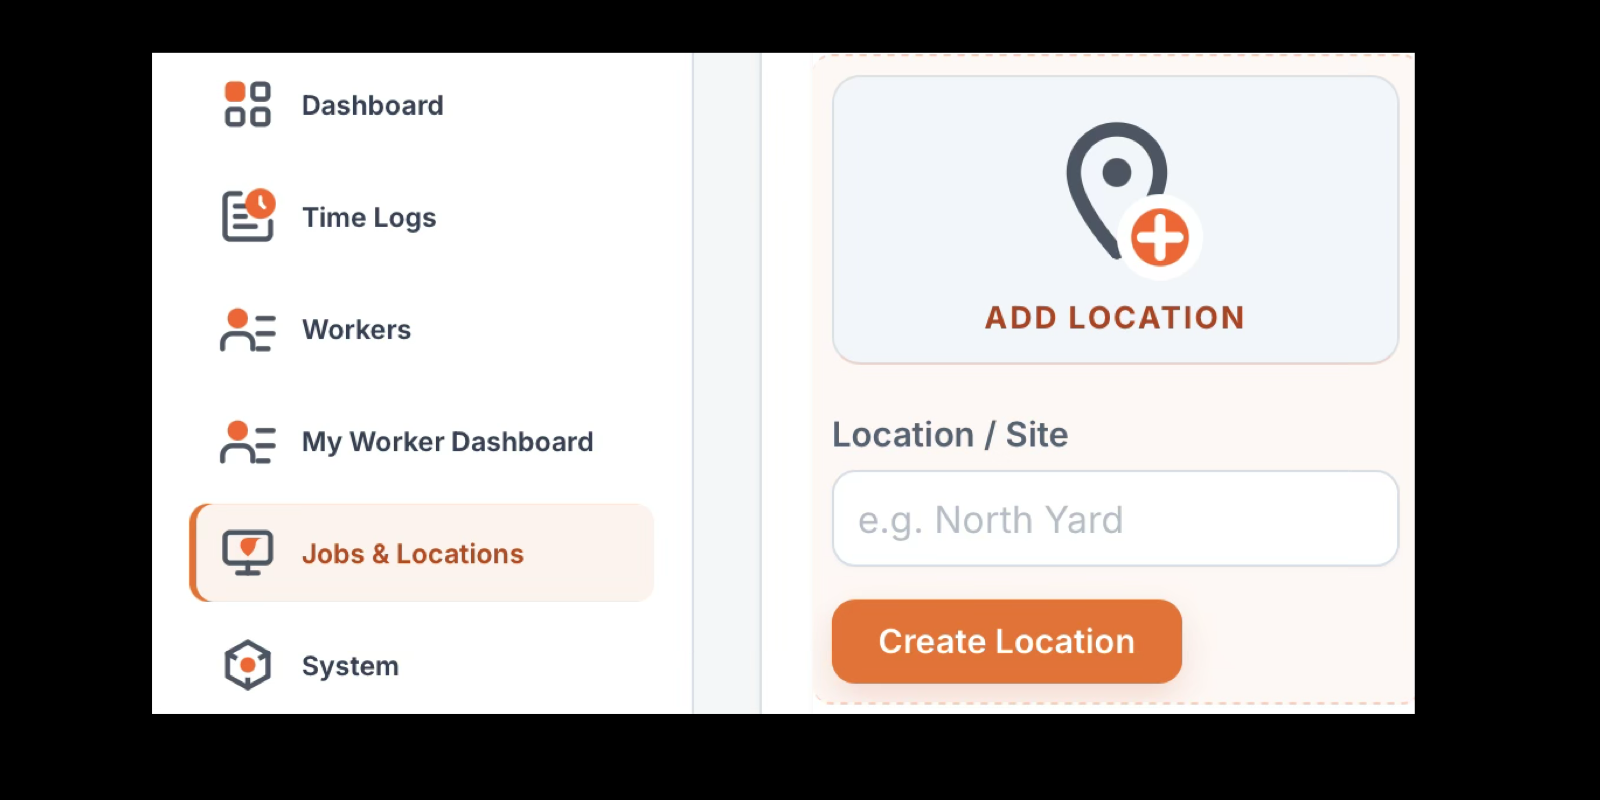
Create locations after jobs. Locations describe where work happens. A location can be a customer site, office, building, shop, route, department, property, or temporary work area.
Clean location names make reports easier to understand later, especially when a business has multiple customer sites or operating locations.
Chapter 5
Kiosks Optional
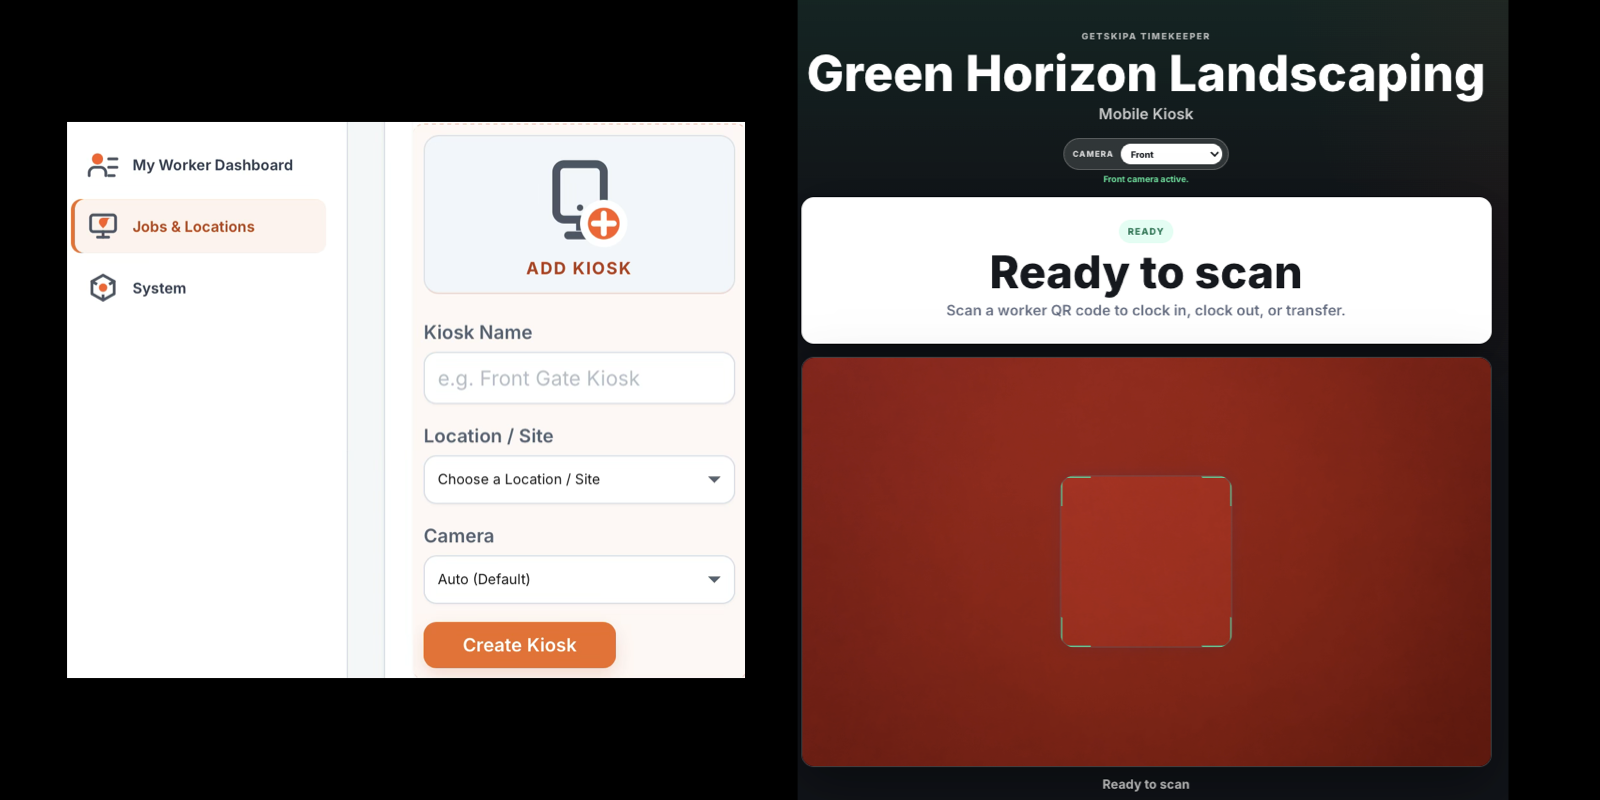
If your business uses a shared clock-in station, create kiosks after jobs and locations are available. A kiosk can run on a tablet, phone, laptop, or desktop browser with a supported camera.
Assign a kiosk to a location that best describes the clock station. Workers use their worker QR code at the kiosk to clock in or clock out. A worker QR works on any kiosk you create. GetSkipa is not responsible for hardware. A stable WIFI or Network Connection is required.
Chapter 6
Workers
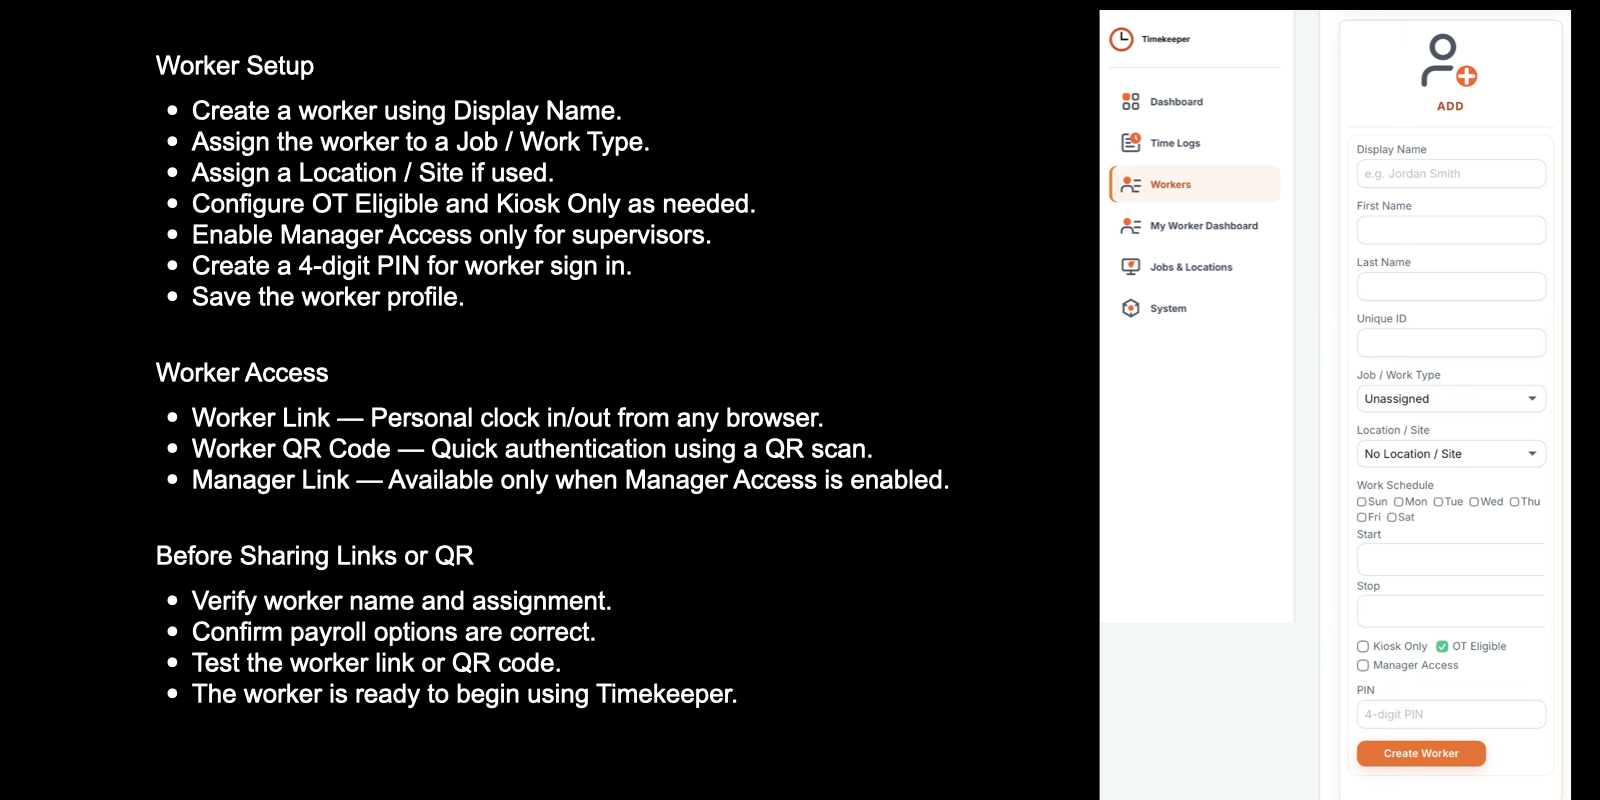
Add workers after the business settings, jobs, locations, and optional kiosks are ready. This lets each worker be assigned to the right job and location from the start.
After workers are added, share the correct access method: personal worker link, worker QR code, or kiosk workflow. Once links or QR codes are shared, workers can begin using Timekeeper.
Chapter 7
Worker Dashboard
The Worker Dashboard gives each worker a private place to record time, review personal hours, approve a timecard, and manage basic account information.
Home
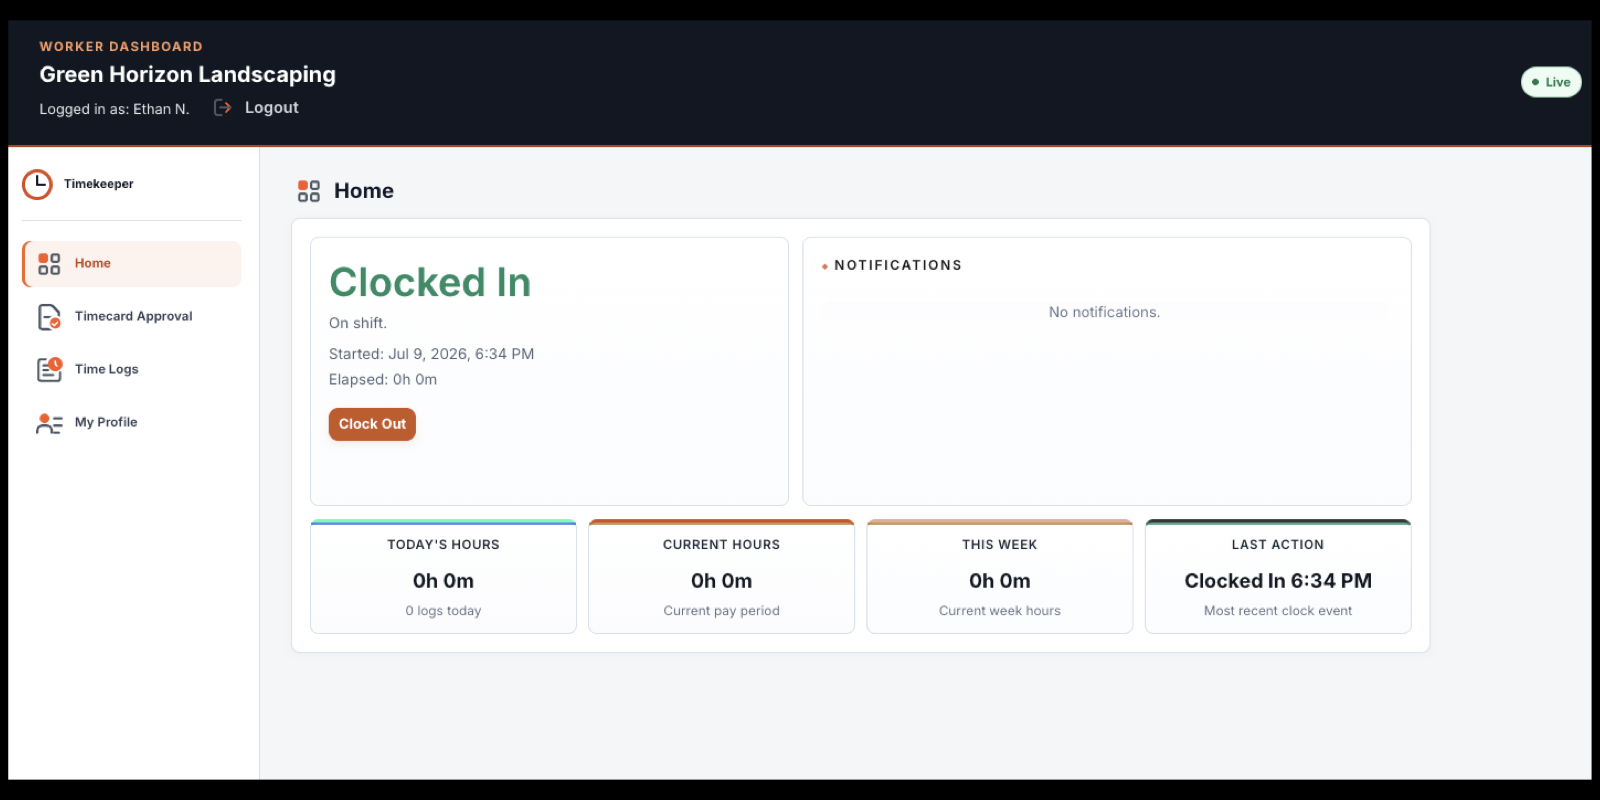
Home shows the worker's current clock status, recent activity, notifications, and current-hour totals. Workers use this page to clock in or clock out when personal-link access is allowed.
- Confirm the correct worker name and business before recording time.
- Review the current status before selecting Clock In or Clock Out.
- Use the hour cards as a quick reference; Time Logs contains the detailed record.
Timecard Approval
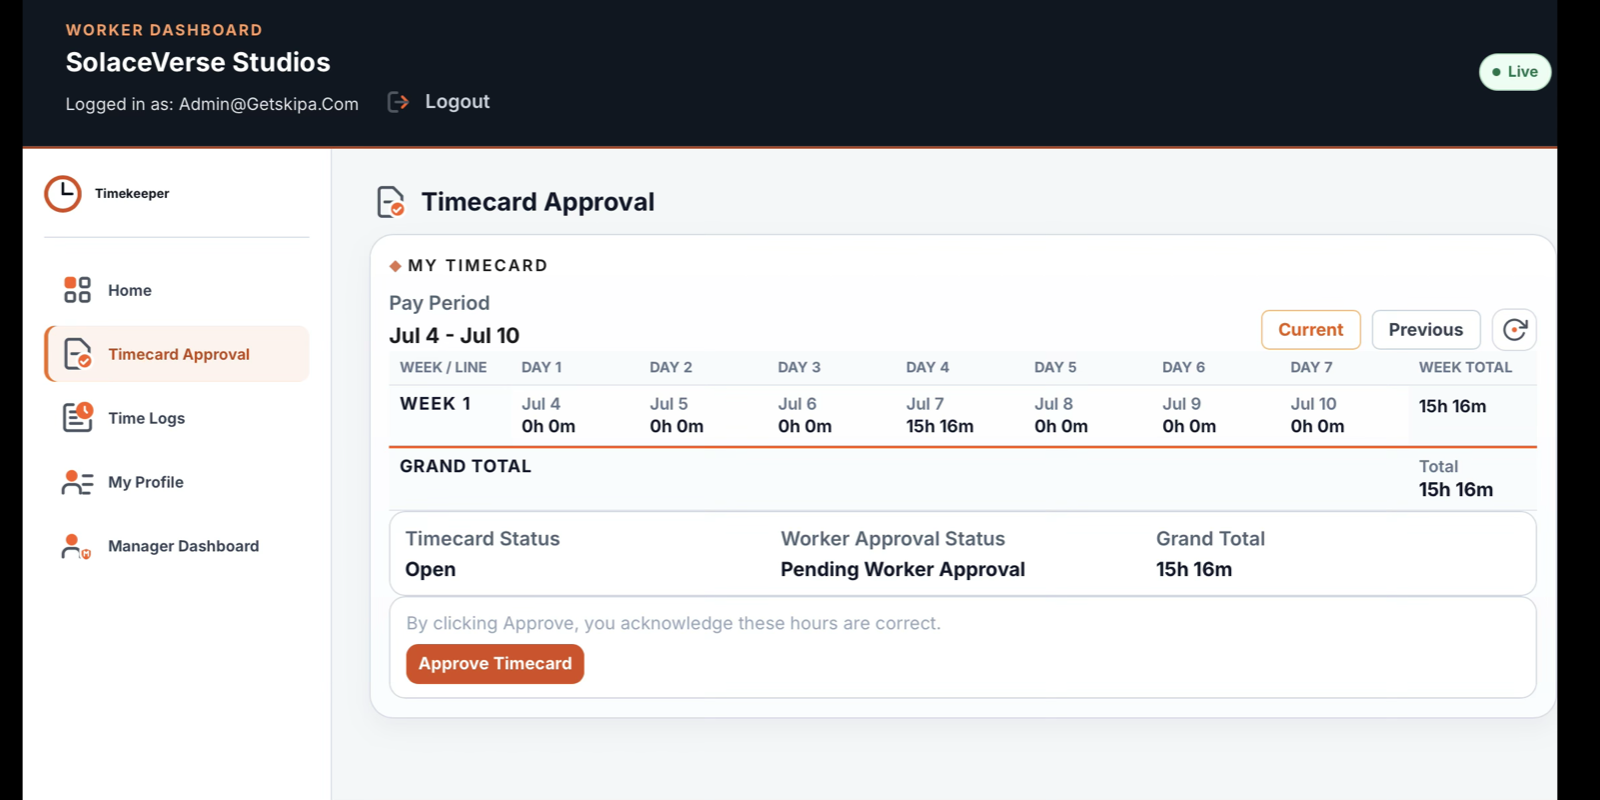
Timecard Approval lets the worker review the selected pay period and acknowledge that the recorded hours are correct. If new time is added or a manager changes the record, another review may be required.
- Review the pay-period dates and total hours.
- Use Current or Previous to select the correct period.
- Select Approve Timecard only after the displayed hours have been reviewed.
Time Logs
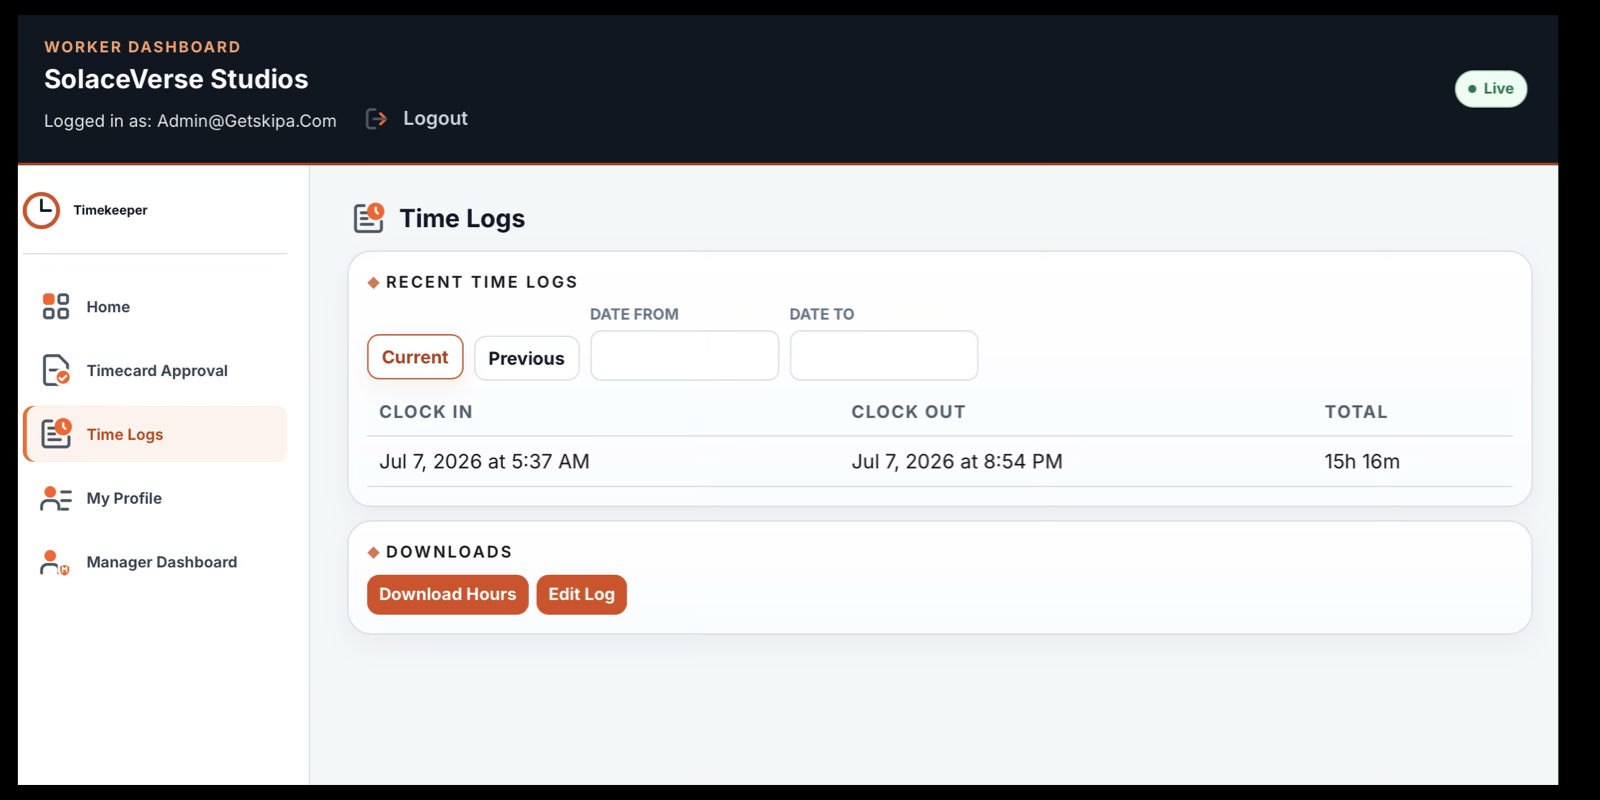
Time Logs provides the worker's detailed clock history. Workers can review current or previous records and download personal hours or the worker edit log when those options are available.
- Confirm clock-in, clock-out, and total time for each entry.
- Use Current, Previous, or the date fields to locate the needed records.
- Download personal records for review or long-term retention.
My Profile
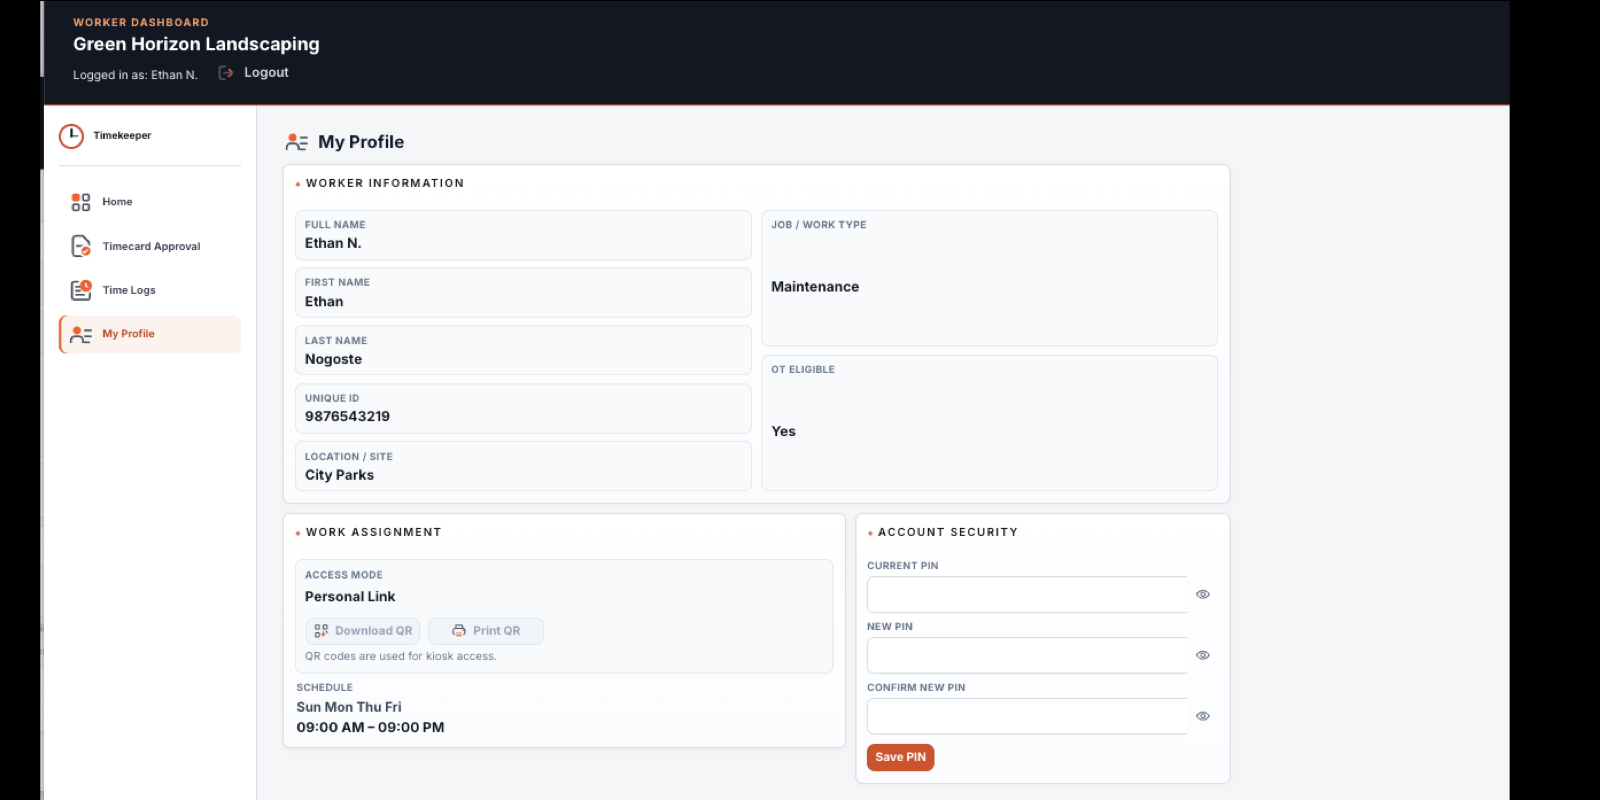
My Profile displays the worker information assigned by the business. It also provides access to the worker QR code and PIN controls when those features are available.
- Review job, location, overtime eligibility, and schedule information.
- Download or print the Worker QR code for kiosk use.
- Protect the current PIN and change it when needed.
Chapter 8
Owner and Manager Dashboards
Owners and authorized managers use the management workspace to monitor current operations, review recorded time, complete approvals, and prepare payroll records.
Dashboard
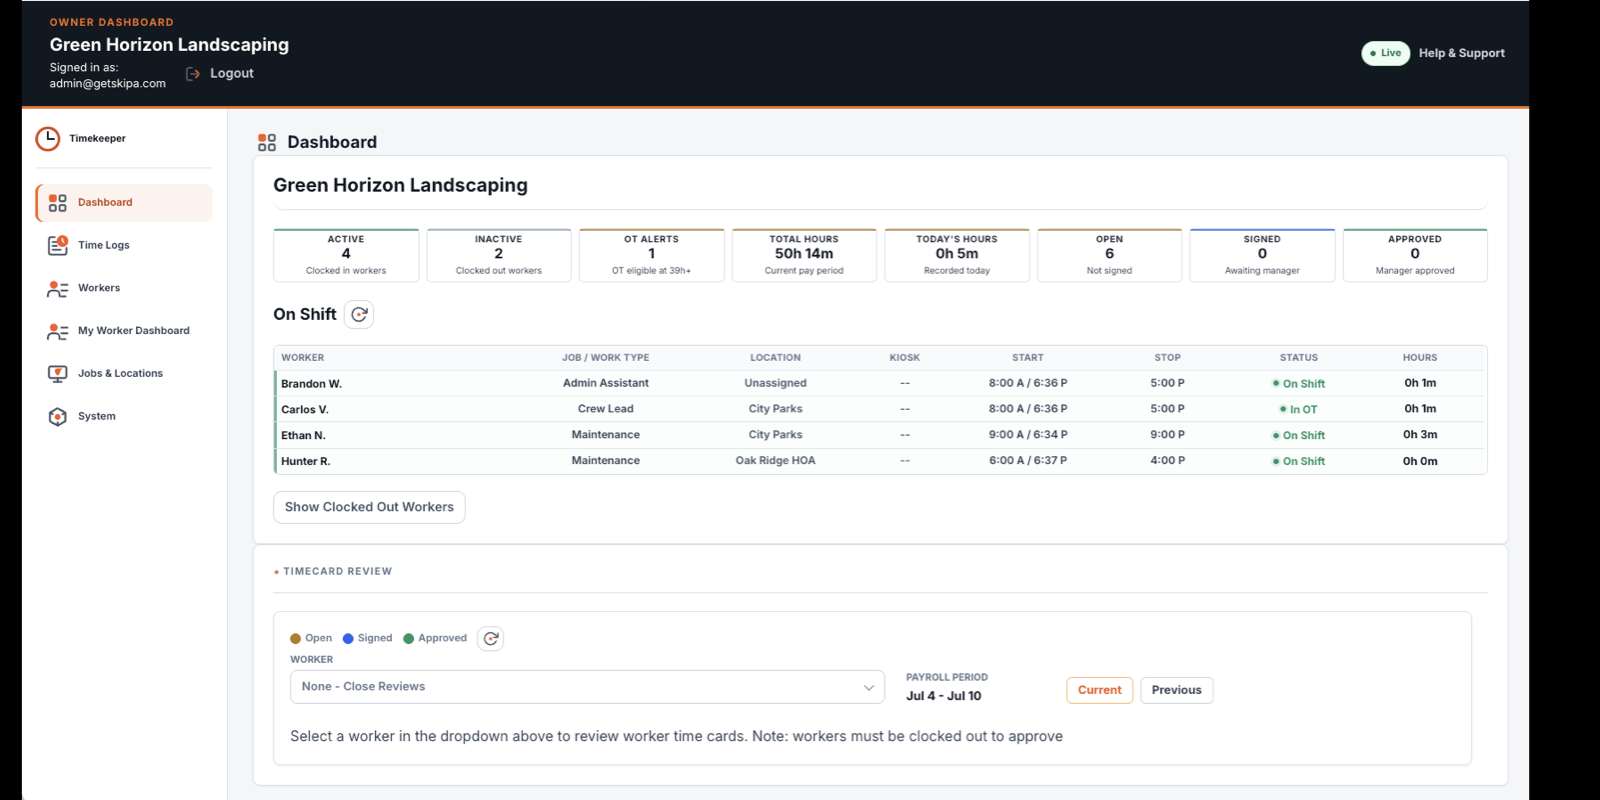
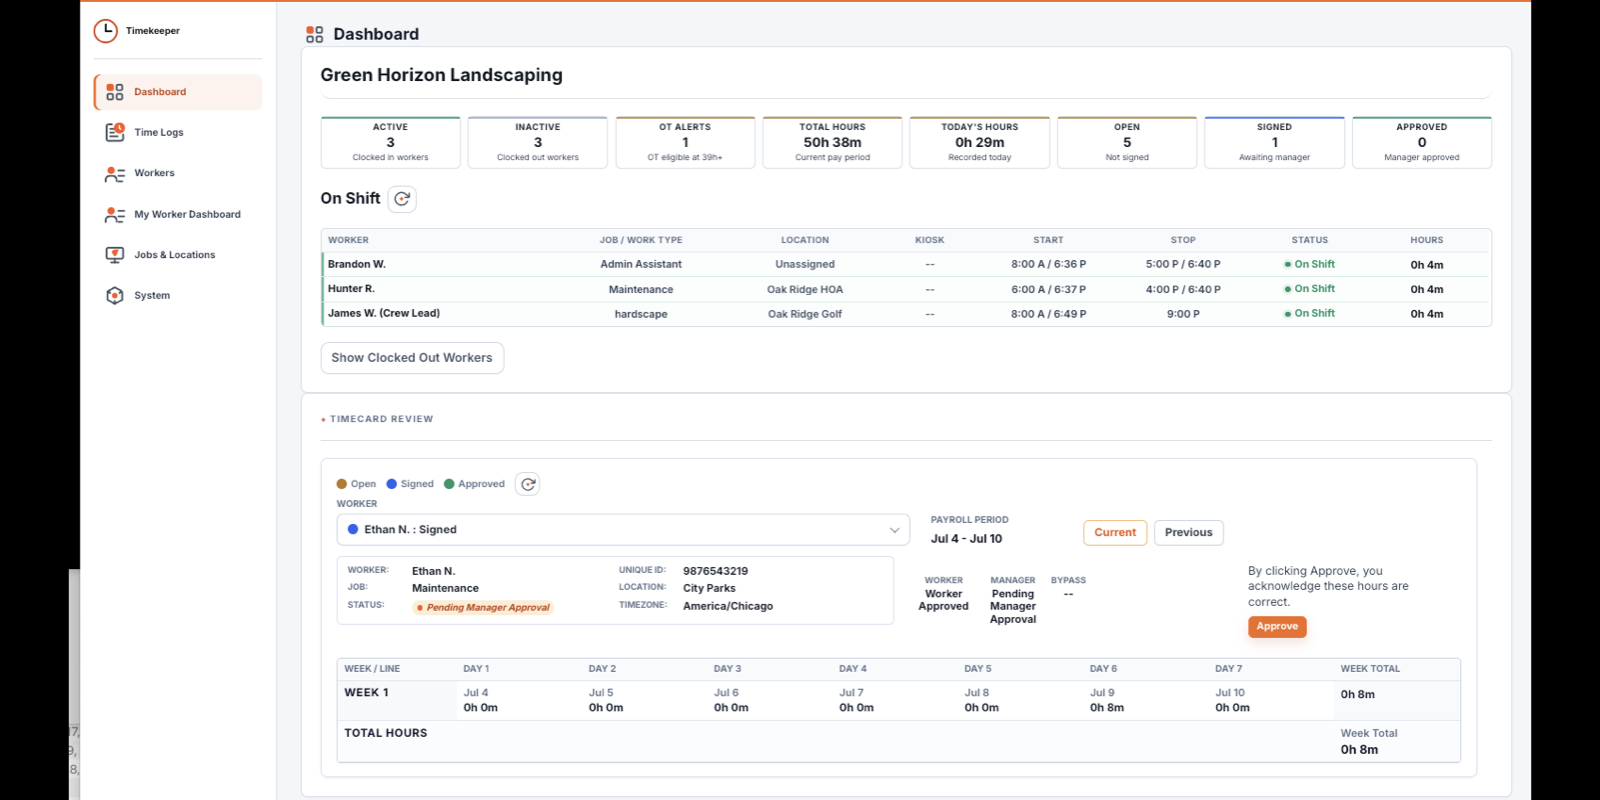
The Dashboard provides a quick operating view of active workers, payroll-period hours, overtime alerts, and timecard status. The On Shift table shows who is currently working and the assignment connected to each open entry.
- Review Active, OT Alerts, Total Hours, Open, Signed, and Approved indicators.
- Use On Shift to confirm who is currently clocked in.
- Use Timecard Review to select a worker and review the current or previous pay period.
Time Logs and Payroll
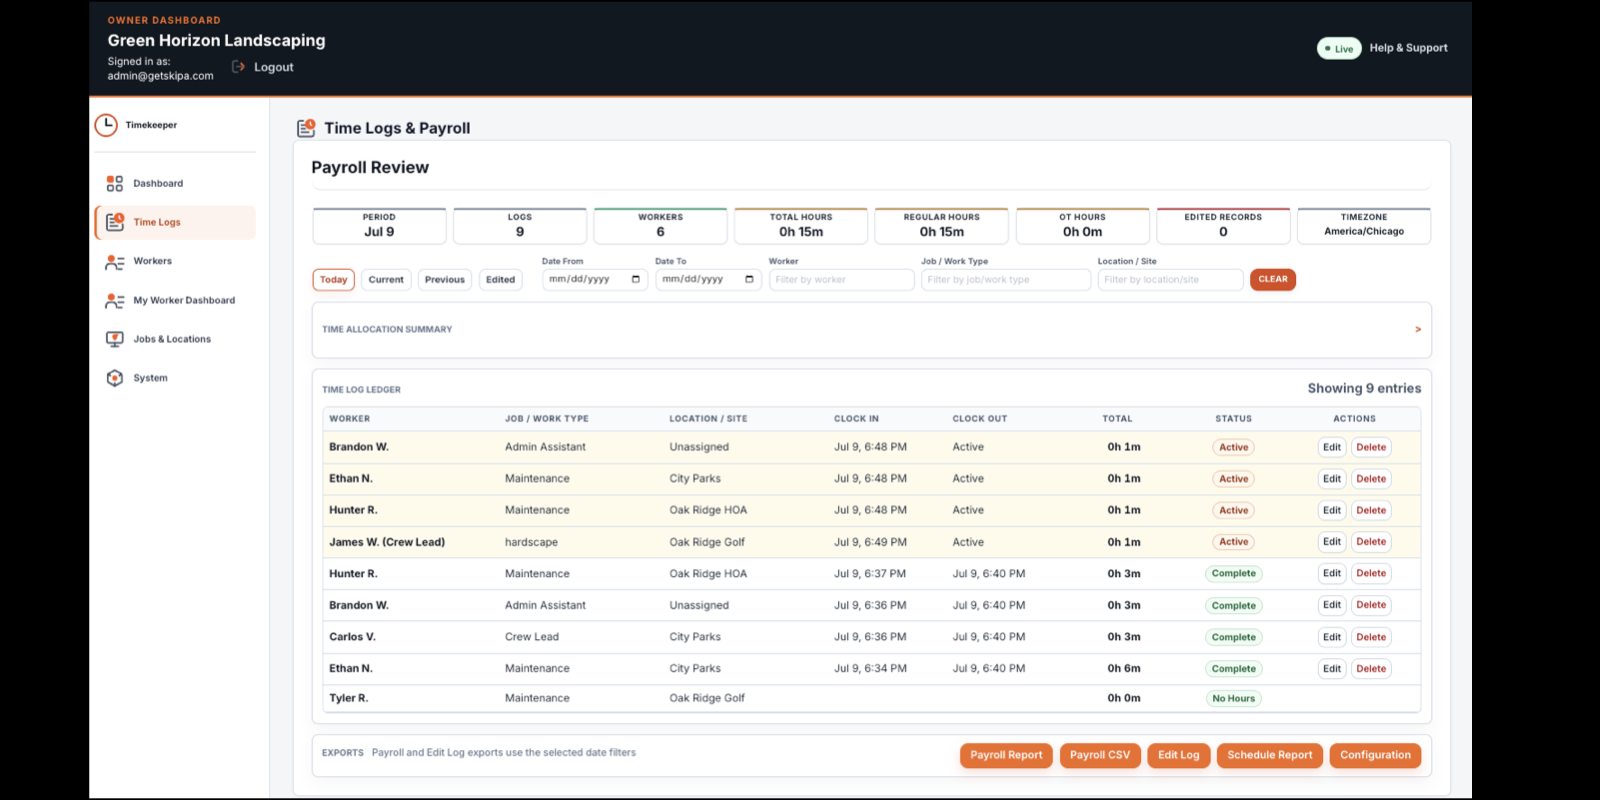
Time Logs and Payroll is the detailed business ledger. Filters control the visible records and the reports generated from the page.
- Select Today, Current, Previous, Edited, or a custom date range.
- Filter by worker, job or work type, and location or site.
- Review active, completed, edited, or no-hours records before exporting.
- Use the export buttons only after the visible records have been reviewed.
Timecard Review
Timecard Review brings the worker's selected pay period, approval state, assignment information, and daily totals into one review area. Managers complete approval only after the timecard is ready.
- Select the correct worker and payroll period.
- Confirm worker approval status and review the daily totals.
- Approve only after the worker is clocked out and the record is complete.
Chapter 9
Troubleshooting
Timekeeper is a browser-based application. Most issues are resolved by confirming the correct link, checking the internet connection, and refreshing the browser before attempting the action again.
Lost Owner PIN
Email admin@getskipa.com. Include the business name and enough information to identify the owner. GetSkipa may request additional verification before assisting with recovery.
Refresh First
Refresh the browser and try the action again. If the issue continues, close and reopen the browser. Clearing the browser cache should be reserved for problems that persist after a normal refresh.
Browser and Connection
Timekeeper runs in a modern web browser and requires an active internet connection for clock activity, approvals, saved changes, reports, and exports.
Kiosk Hardware
Kiosks have been tested on multiple iOS and Android devices. Hardware, browser behavior, camera quality, mounting, power, and network reliability vary. Research and test the device that best fits the work environment.
Use the trial period as a live setup period
Complete business setup, create test workers, record sample time logs, test worker links and QR codes, and allow workers to practice before the first live payroll period. Have the person responsible for payroll review the Payroll Workbook and CSV downloads before the trial period ends.
Contacting GetSkipa
Email is the preferred support method. Send requests to admin@getskipa.com and include the business name, the page or workflow involved, what you expected to happen, what actually happened, and screenshots when possible.